In a prior post, we described how to use API Builder to implement a Twitter Bot that posted tweets, retweeted and also followed anyone that followed the bot.
In this blog post, we describe how to use API Builder to create a Facebook chatbot. A Facebook chatbot can be used to engage employees or clients who visit your page and allow them to discover information about your company and products in a more natural chat format.
This post will not dive into the AI aspect of chatbots but focus more on the mechanics of setting up API Builder for implementing a Facebook chatbot.
You can view and interact with the chatbot here.
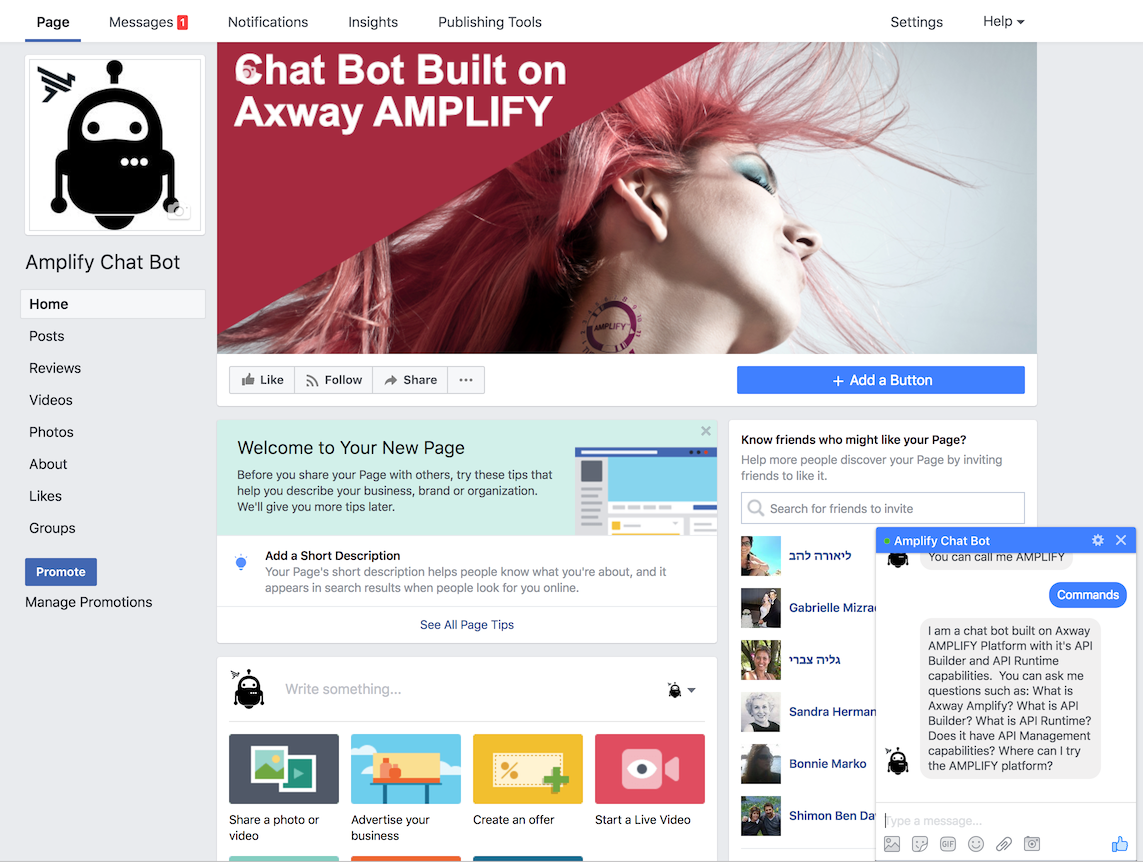
You can expect an experience similar to the screenshot below where I am interacting with the chatbot in the lower right-hand corner of the page:
Background
The basic idea is to create the bot on Facebook and then create the Facebook-required APIs (webhooks) in API Builder. API Builder will also be used to implement the artificial intelligence (AI) required to make the bot (seemingly) intelligent.
I found the Facebook Messenger Platform Quick Start Guide to be a great place to get started with the creation of a Facebook chatbot. I only followed steps 1 – 6 of this guide to get the basics implemented.
How to Build a Facebook Bot App Using Node.js was also a useful resource.
I’m not going to cover the Facebook chatbot creation as it’s well documented in the QuickStart guide, so let’s dive into API Builder.
API Builder Webhook for Subscription
In step 2 of the Facebook Messenger Platform Quick Start Guide, we need to provide the URL of an API endpoint that can take a GET request. The Quick Start Guide provides the Express code for this.
In API Builder, I chose to implement this as a Custom API. My Custom API, in the file /api/fbwebhook.js, is shown below:
var Arrow = require('arrow');
var fbwebhook = Arrow.API.extend({
    group: 'webhooks',
    path: '/api/fbwebhook',
    method: 'GET',
    description: 'this is an api that shows how to handle requests from the FB chatbot',
    parameters: {
        'hub.mode': {
            description: 'hub.mode',
            optional: true
        },
        'hub.challenge': {
            description: 'hub.challenge',
            optional: true
        },
        'hub.verify_token': {
            description: 'hub.verify_token',
            optional: true
        }
    },
    action: function(req, resp, next) {
        if (req.query['hub.mode'] === 'subscribe' &&
            req.query['hub.verify_token'] === '') {
          resp.response.status(200);
          resp.send(req.query['hub.challenge']);
        } else {
          resp.response.status(403);
        }
        next();
    }
});
module.exports = fbwebhook;
Here is where I faced the first challenge.
Facebook does not allow me to change the webhook URL once I enter it into the Facebook developer portal. With API Builder, you are typically developing and testing the API Builder project locally and then publish it when you are done. So, you need to publish the API Builder project and then use that URL for the Facebook chatbot. But that poses a development conundrum, since it is very slow to make changes, and then publish to production after each change.
My solution was to create two bots, one for dev and one for production.
During development, I use the dev chatbot and ngrok, so that Facebook can actually call an API Builder API running locally in dev mode.
The production of Facebook chatbot will use the API Builder production API for its webhook.
The one issue using this method is that I need to manage two Facebook page access tokens. This is covered in the next section.
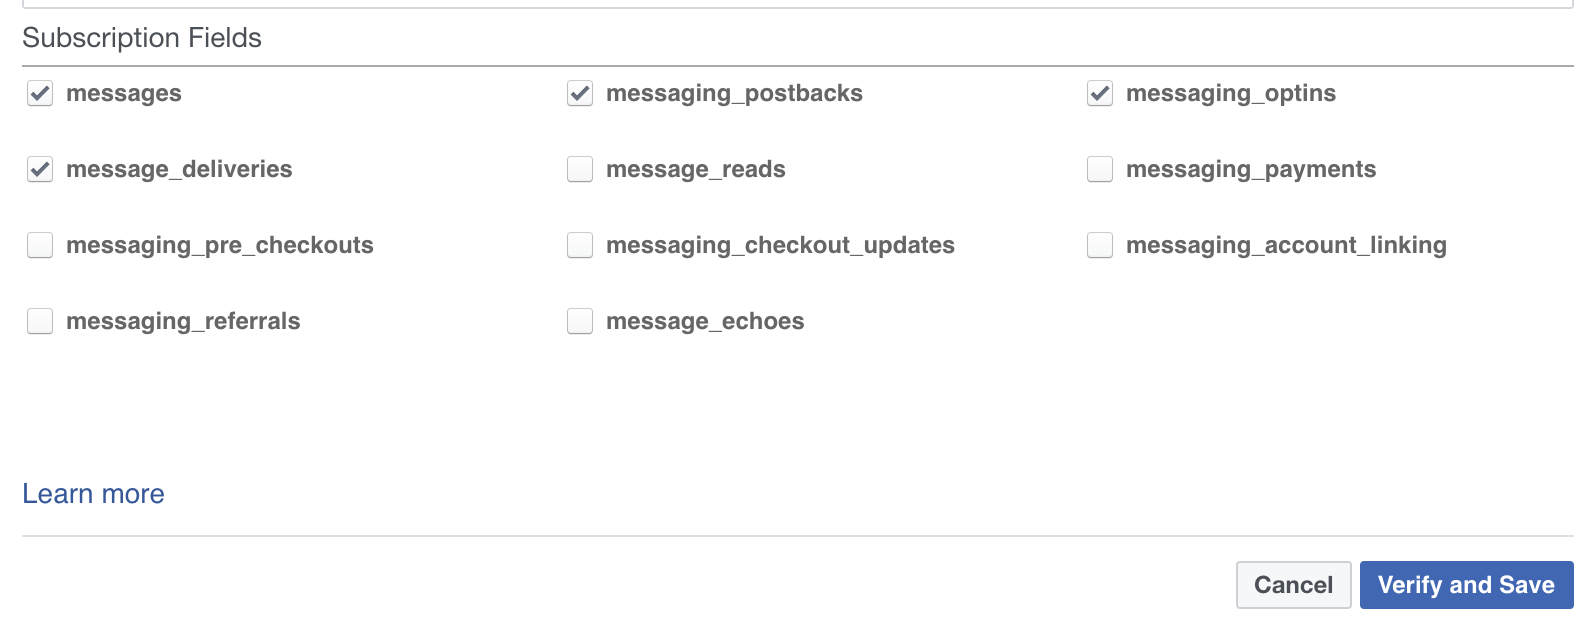
Another issue that I faced following the Quick Start Guide is that the instructions mention selecting messages and messaging_postbacks under Subscription Fields. Another guide I found suggested also subscribing to messaging_optins and message_deliveries as well. I found that I needed these additional two subscription fields checked in order to get the chatbot approved by Facebook. See the screenshot below:
API Builder Webhook for Chatting
When a user types into the chatbot, Facebook will make a POST request to the same endpoint described above. This is described in section 5 of the Facebook Messenger Platform Quick Start Guide. In this step, you will also generate a Page Access Token.
The express code in the Facebook guide simply echoes back what the user typed.
Again, we’ll create an API Builder Custom API with the same endpoint, but it will be a POST this time. My custom API, in the file, /api/fbwebhookp.js, is shown below. Note that all the methods – like receivedMessage() – are not shown below but are included in the Github link at the end of this post.
var Arrow = require('arrow');

.
.
.

var fbwebhookp = Arrow.API.extend({
    group: 'webhooks',
    path: '/api/fbwebhook',
    method: 'POST',
    description: 'this is an api that shows how to handle requests from the FB chatbot',
    parameters: {
        'object': {
            description: 'object',
            optional: true
        },
        'entry': {
            description: 'entry',
            optional: true
        }
    },
    action: function(req, resp, next) {
      var data = req.body;
      if (data.object === 'page') {
        data.entry.forEach(function(entry) {
          var pageID = entry.id;
          var timeOfEvent = entry.time;
          entry.messaging.forEach(function(event) {
            if (event.message) {
              receivedMessage(event);
            } else {
              console.log("Webhook received unknown event: ", event);
            }
          });
        });
        resp.response.status(200);
        next();
      } else {
        resp.response.status(200);
        next();
      }

    }
});
module.exports = fbwebhookp;
At this point, you have a chatbot that you can send messages to and the message will be echoed back to you. However, Facebook will not approve such a bot. It needs to provide some useful responses. We’ll cover adding AI in a future blog post. Stay tuned. In the meantime, you can find the code for this project here.
Follow us on social