Appcelerator provides a number of capabilities for monitoring your Arrow applications. These are accessible from the Dashboard and documented here. However, what if you want more detailed monitoring and alerting? Well, there are various APM (Application Performance Monitoring) solutions on the market which specialize in this area. One such solution is New Relic.
This blog post describes how to add New Relic APM to your Arrow Builder application, which may be useful for debugging complex performance-related issues.
Since your Arrow Builder application is based on Node.js and Express, and New Relic supports Node.js with express (and other frameworks), this is a great match.
The basic steps for adding New Relic APM to your Arrow Builder app are:
- Sign up for New Relic and get your license key
- Install the New Relic APM npm into your Arrow project
- Configure the newrelic.js file
- Require New Relic in your Arrow app
- Edit your Arrow app’s package.json to add New Relic as a dependency
- Deploy the Arrow app
- See your data in the New Relic dashboard
Sign up for New Relic And Get Your License Key
Add a new New Relic app and select Node from the list of choices as per below.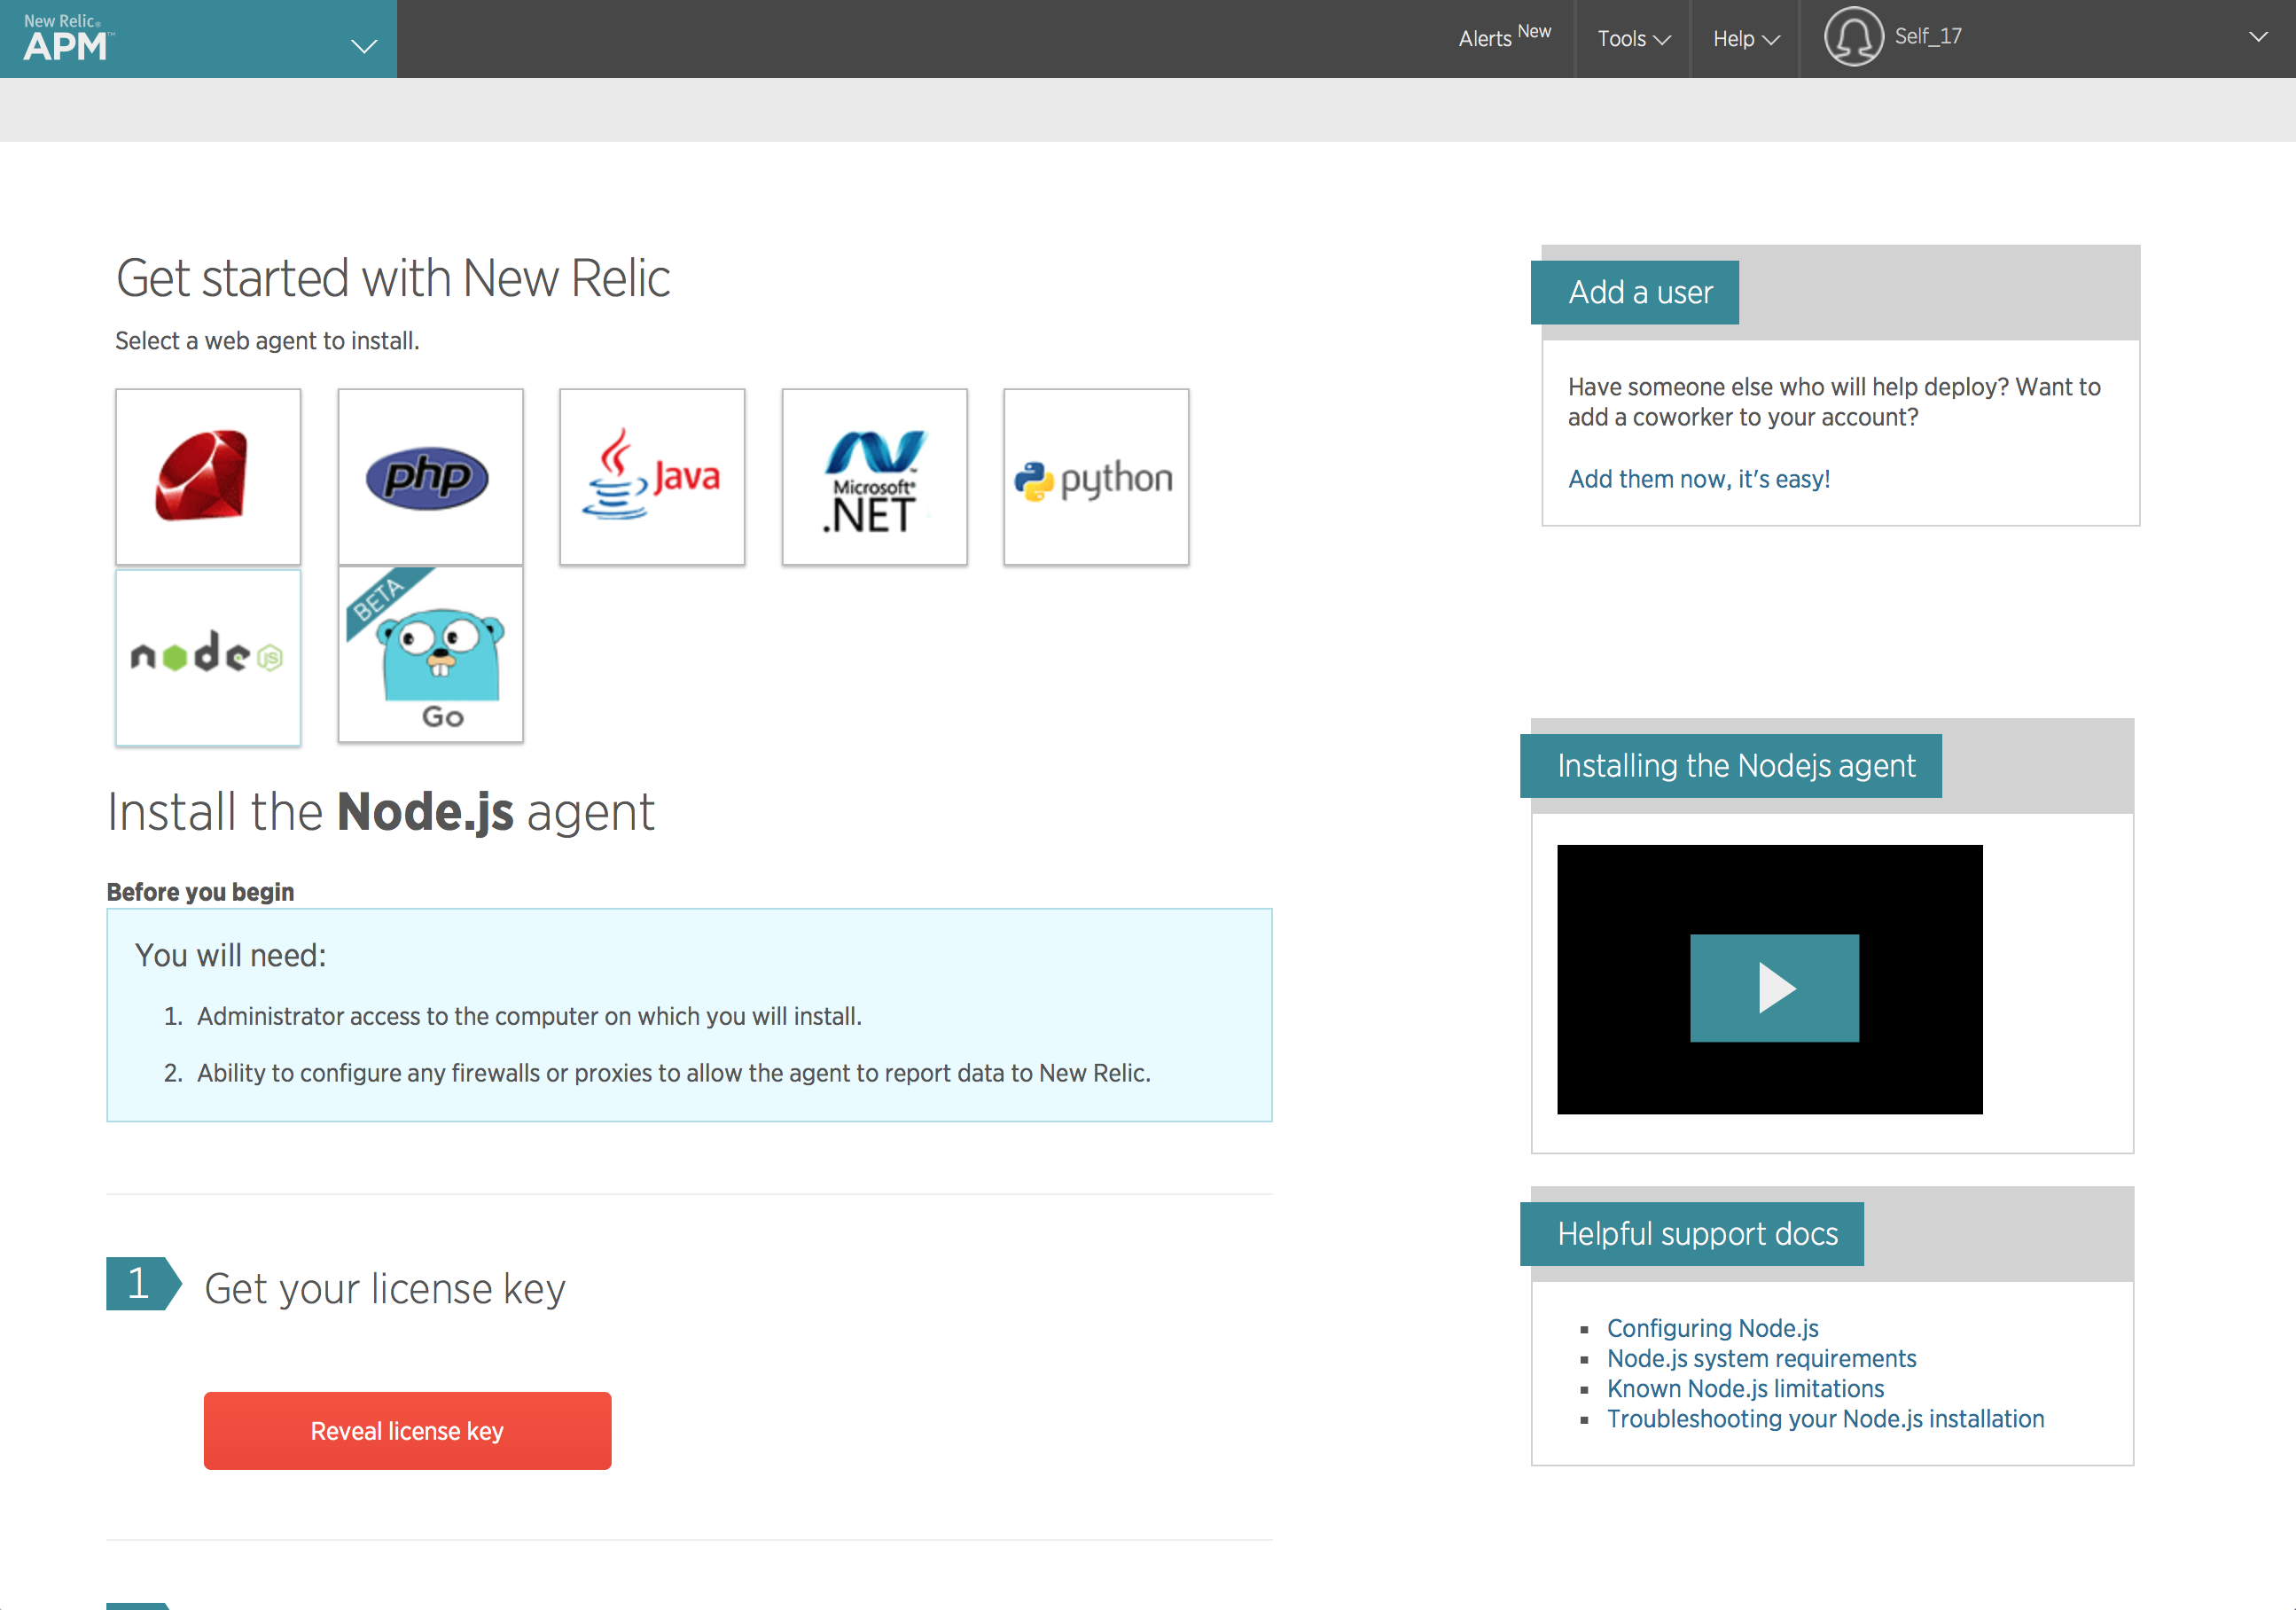
Click on the reveal license key button and copy your license key as you will need that later.
Install New Relic In Your Arrow Builder Project and Configure newrelic.js
From Terminal or the Command Prompt, change directory to your Arrow Builder project’s directory and install New Relic using the following command:
npm install newrelicIn your Arrow Builder project folder in the node_modules folder you will see a new sub folder called newrelic.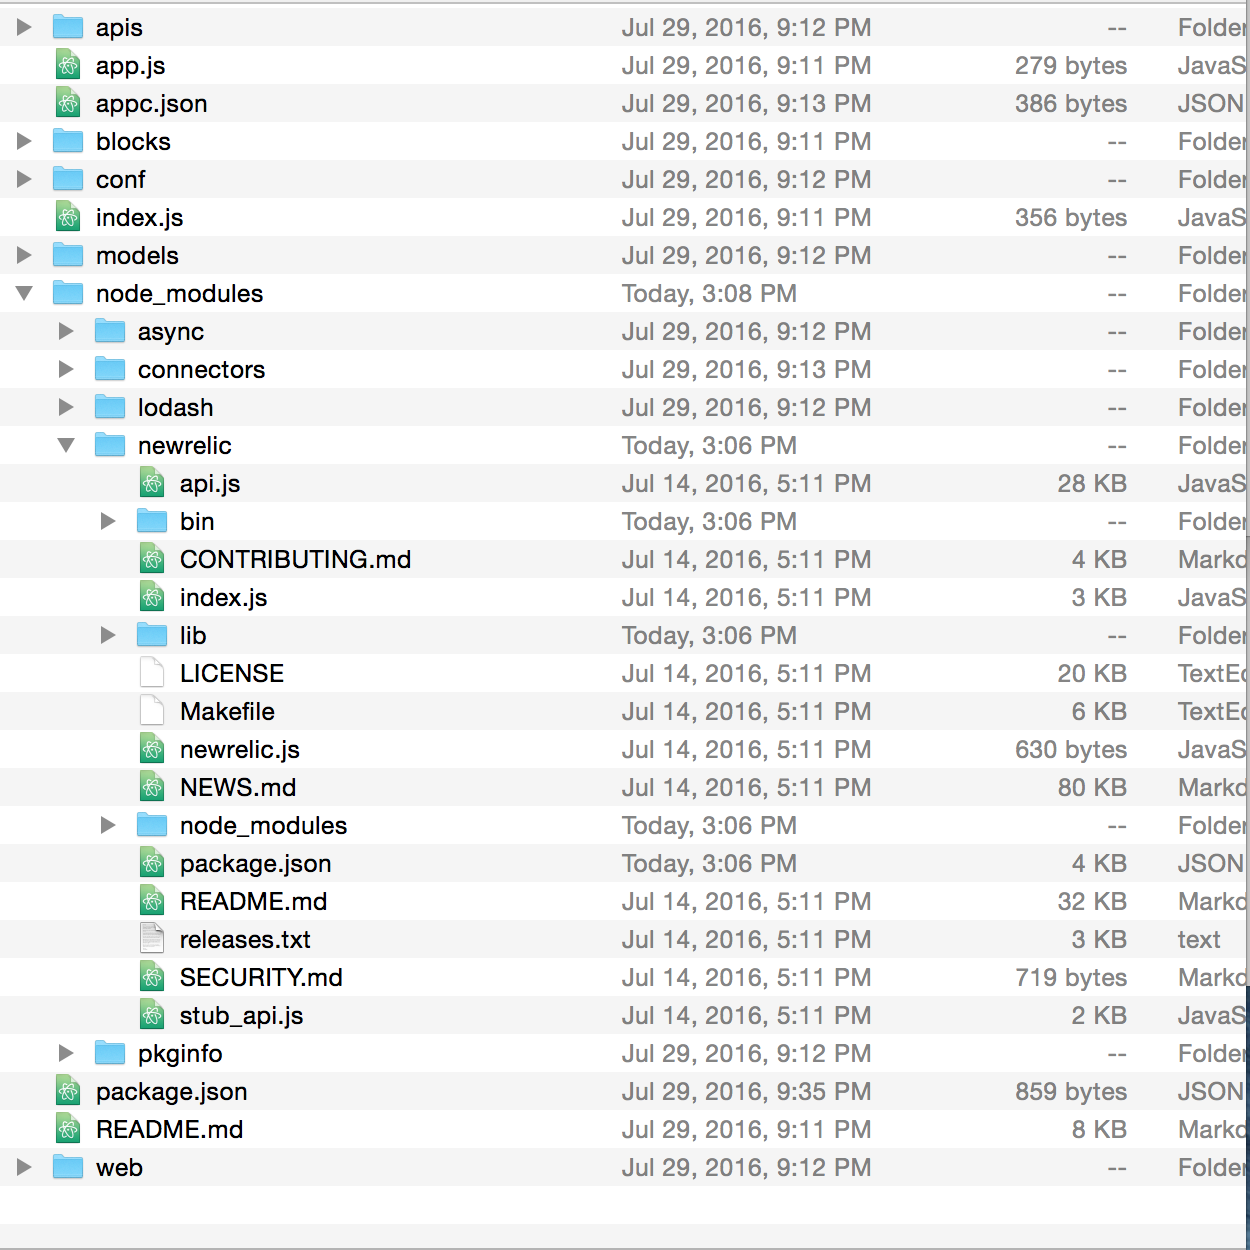
Copy newrelic.js from node_modules/newrelic into the root directory of your Arrow Builder application.
Set a value for app_name.
Replace the license_key value with your New Relic license key revealed above.
It should look similar to below
'use strict'
/**
 * New Relic agent configuration.
 *
 * See lib/config.defaults.js in the agent distribution for a more complete
 * description of configuration variables and their potential values.
 */exports.config = {
  /**
   * Array of application names.
   */  app_name: ['lbsfdemoapi'],
  /**
   * Your New Relic license key.
   */  license_key: 'abcdef0123456789abcdef0123456789abcdef0123456789',
  logging: {
    /**
     * Level at which to log. 'trace' is most useful to New Relic when diagnosing
     * issues with the agent, 'info' and higher will impose the least overhead on
     * production applications.
     */    level: 'info'
  }
}
Require New Relic in your Arrow app
Edit your app.js file and add the following to the top of the file:
var Newrelic = require('newrelic');Edit your Arrow app’s package.json to add New Relic as a dependency
Edit your package.json and add the following line to the dependencies section:
"newrelic": "^1.28.3"It should now look similar to below:
{
    "name": "lbsfdemoapi",
    "description": "",
    "version": "1.0.0",
    "author": "Leor Brenman",
    "license": "",
    "framework": "none",
    "keywords": [
        "appcelerator",
        "arrow"
    ],
    "repository": {},
    "private": true,
    "dependencies": {
        "async": "^1.5.0",
        "lodash": "^3.10.1",
        "pkginfo": "^0.3.1",
        "newrelic": "^1.28.3"
    },
    "devDependencies": {
        "grunt": "^0.4.5",
        "grunt-appc-js": "^1.0.19",
        ...
The version number above can be replaced with the desired New Relic version you want to use. If you are unsure, look in the node_modules/newrelic folder in the package.json folder and find the version number near the top of the file as follows:
{
  "name": "newrelic",
  "version": "1.28.3",
  "author": {
    "name": "New Relic Node.js agent team",
    "email": "nodejs@newrelic.com"
  },
  "licenses": [
    {
      "type": "proprietary",
      "url": "https://raw.github.com/newrelic/node-newrelic/master/LICENSE"
    }
  ],
  "contributors": [
    {
      ...
Deploy the Arrow app and See your data in the New Relic dashboard
Run your project locally using:
appc runOr publish your application using:
appc publishAfter about 5 minutes or so, you should see data in the New Relic dashboard as follows: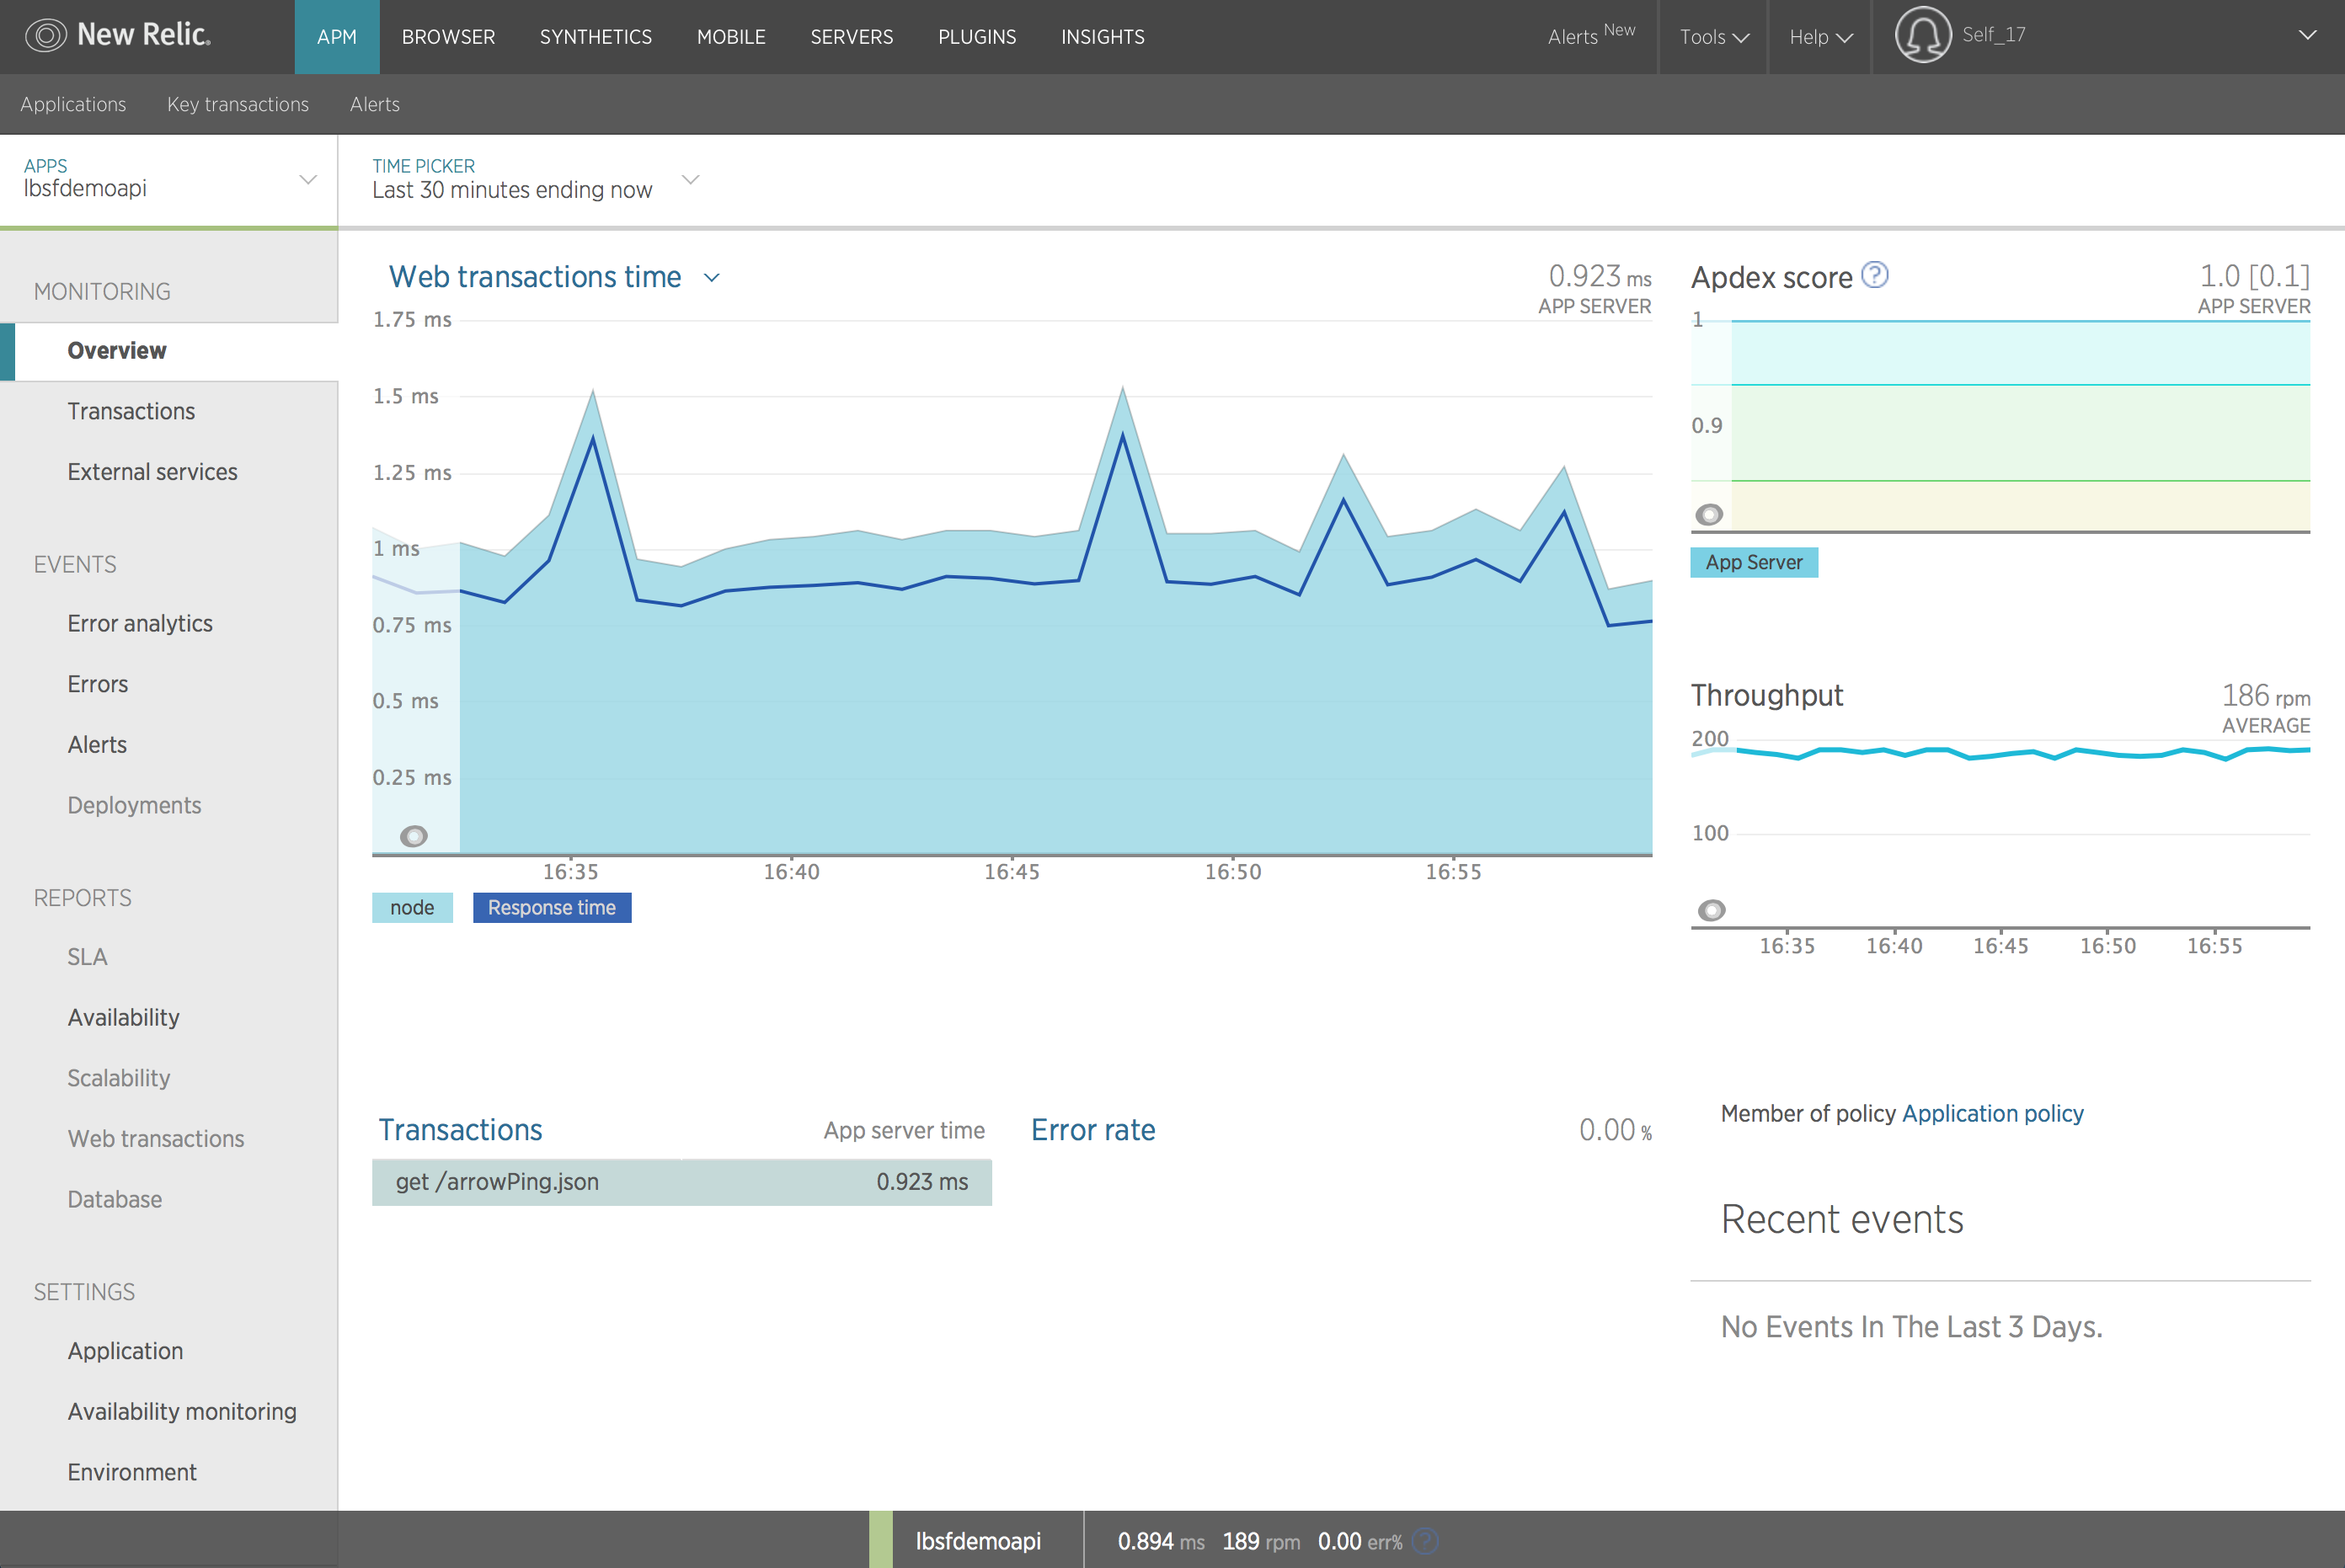
After running a load test, it may look like this: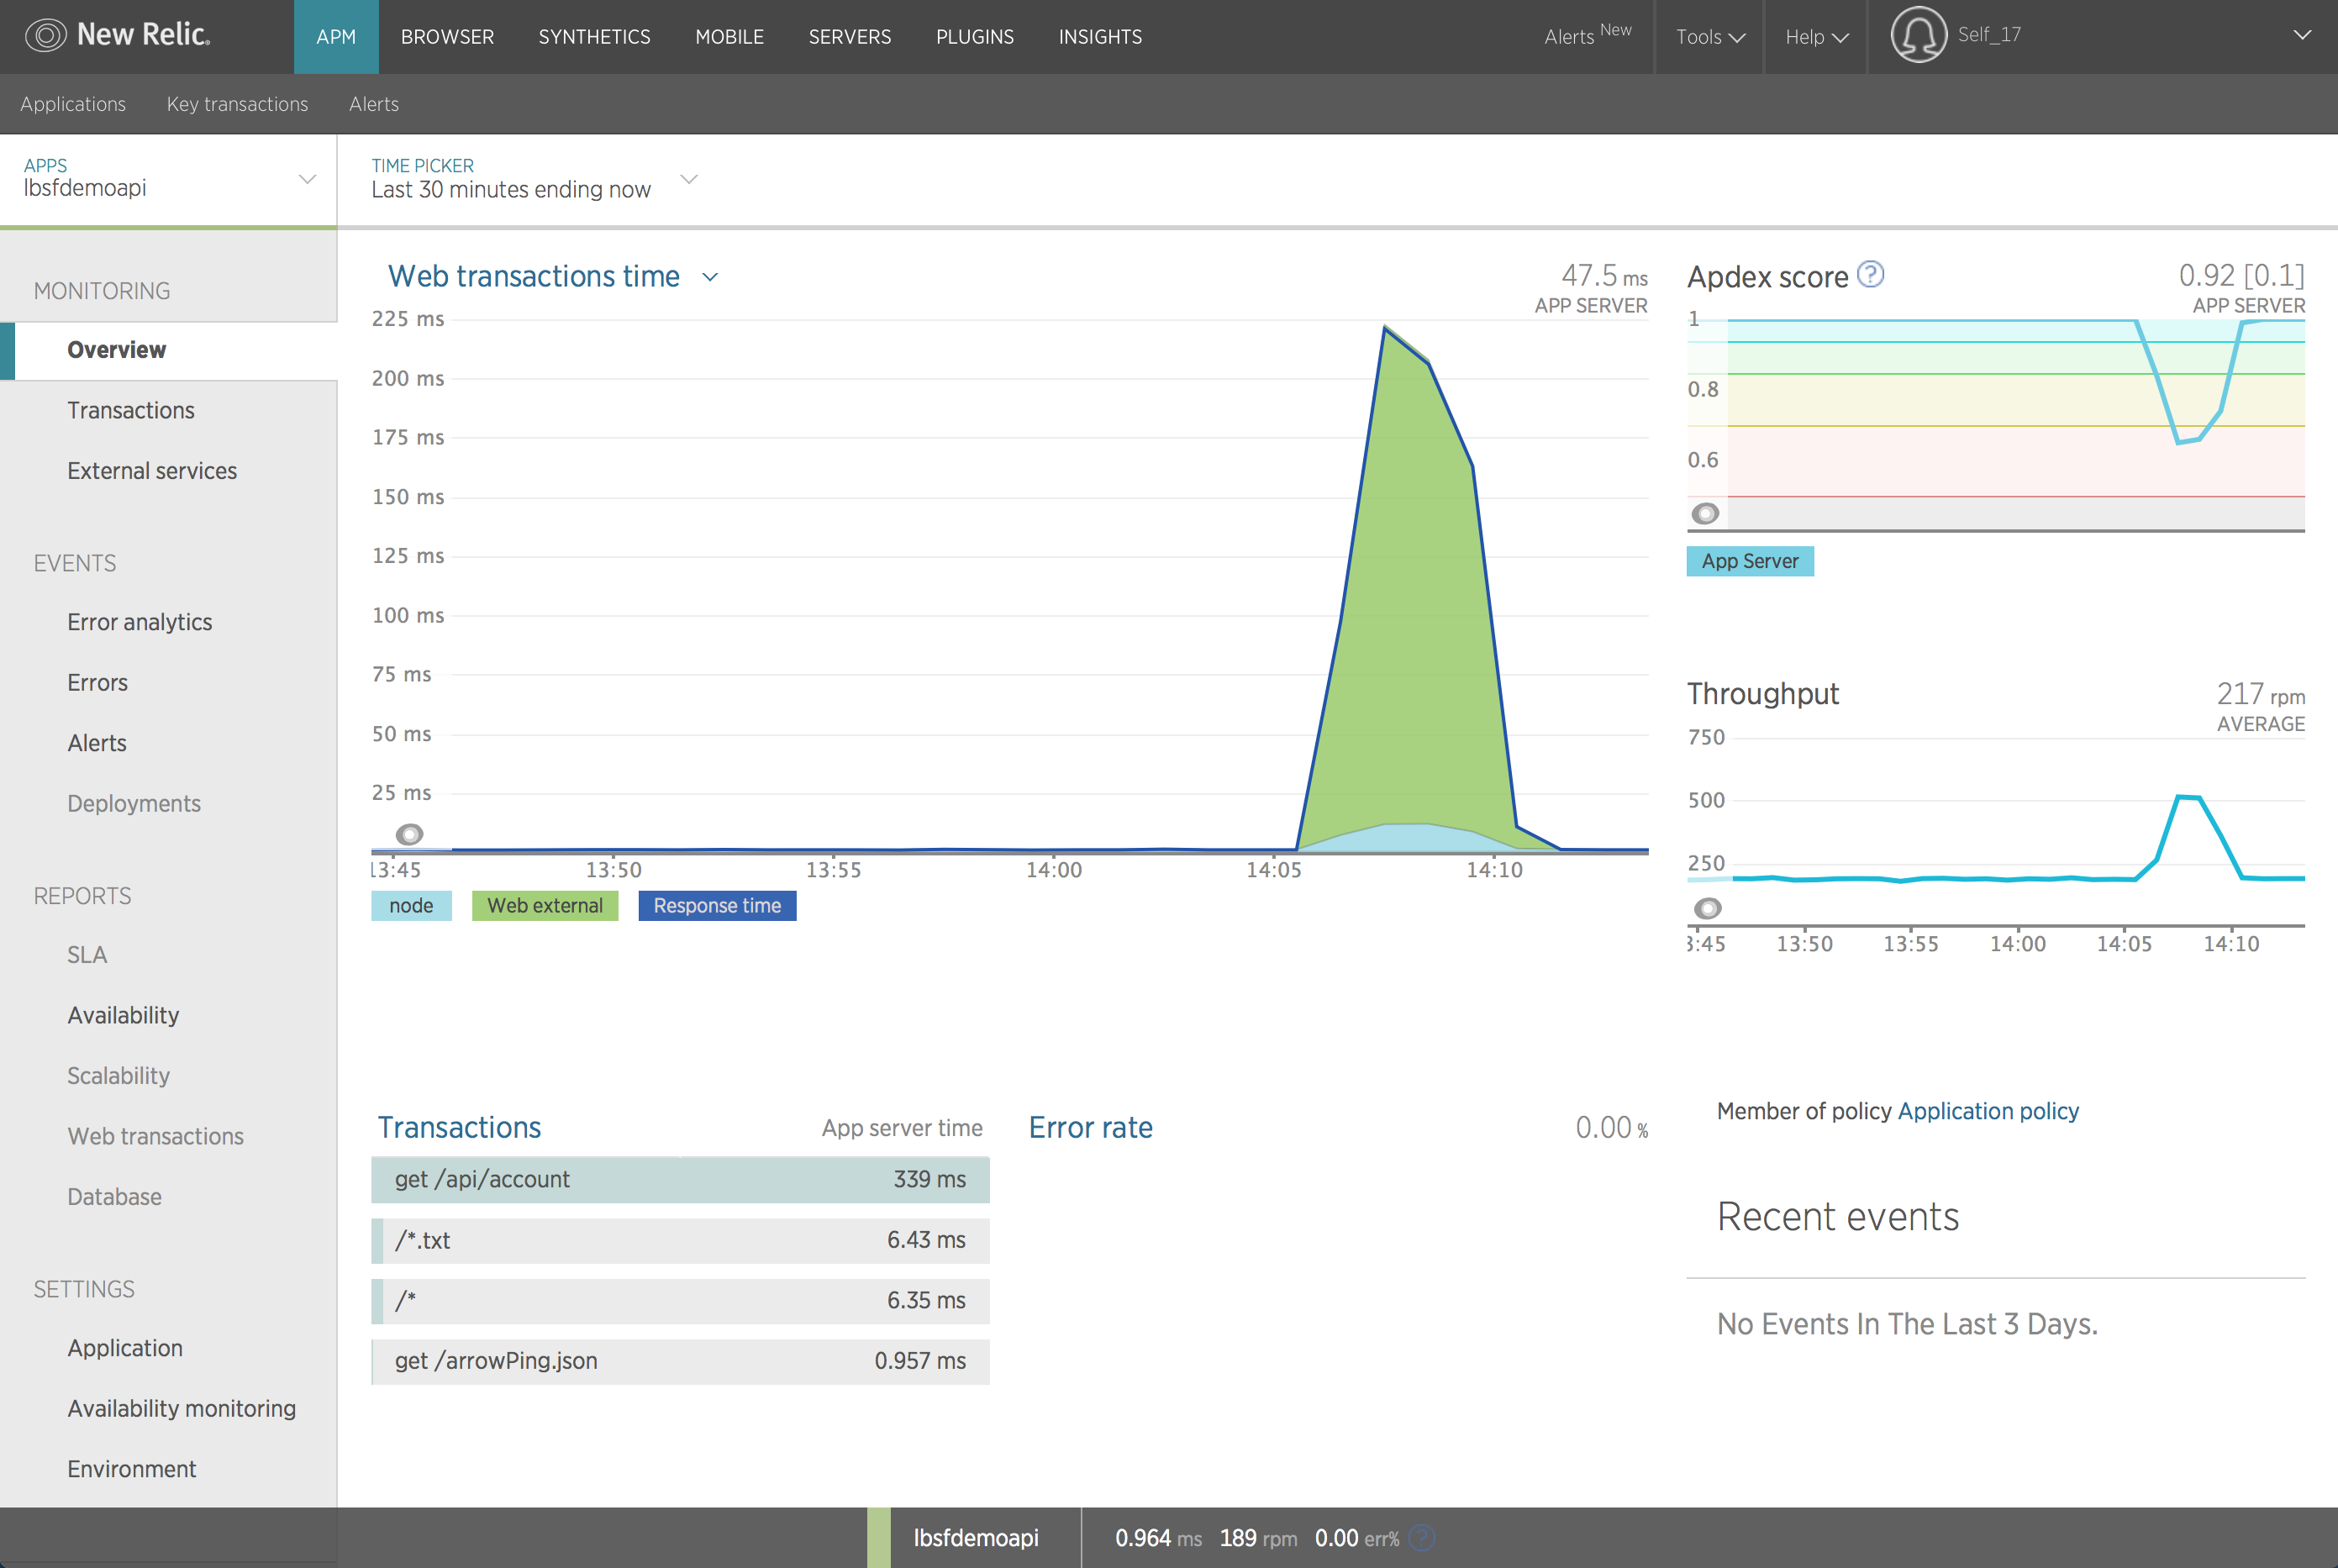
Follow us on social