
In a previous post, we registered for a Quickbooks Online sandbox, connected to it with an Application Integration Connector instance and configured webhook alerts. This article will demonstrate how to use the webhook enabled connector instance in an integration Flow.
In the scenario we will build here, the Quickbooks Sandbox company, we created in the previous article will make a bill payment against one of their invoices and the vendor they are paying will be notified via Slack.
I chose to use Slack here because it provides visual feedback with no need to have more complex systems to integrate with. You could imagine, in place of Slack, the Integration flow could call a banking API which initiates a funds transfer between bank accounts and then posts a payment to the vendor’s financial system. That scenario is much more involved than we want to get into here, but what you learn in this article will give you the building blocks you need to create more complex integrations.
In this article, I am assuming some basic familiarity with the Integration Builder UI. If you want to first go through an example with more detailed instructions and screen captures, then check out my previous article Create a Simple Integration Builder Flow. If you are already confident with the UI, then let’s get started.
Getting Started
You will need to do two things before starting to build the Integration Flow:
- Modify the webhook you created for your Quickbooks Sandbox company to also send events on the Create action of the BillPayment entity. If you need a refresher, navigate to the Configure Webhooks section of the previous article.
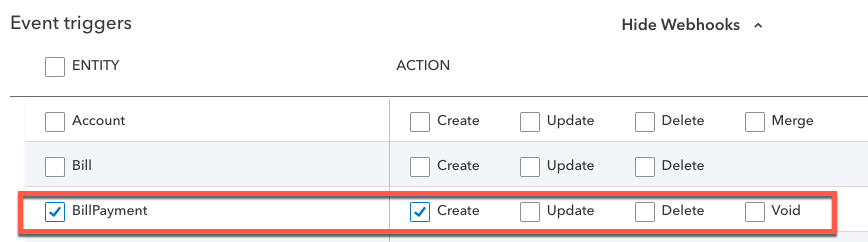 Now Quickbooks will send an alert to AMPLIFY whenever a Bill Payment is made.
 - Create a Slack Channel to receive notifications and connect to it fromAMPLIFY™ Integration Builder. Let’s look at this part now.
- Modify the webhook you created for your Quickbooks Sandbox company to also send events on the Create action of the BillPayment entity. If you need a refresher, navigate to the Configure Webhooks section of the previous article.
Create a Slack Channel
Point a browser to slack.com. Log into your existing account or create a free one. Click on the Your Workspaces button and select Create Workspace. You will be walked through a setup wizard which prompts you to provide your e-mail address, Company or Team and Project. For Company or Team use Acme Widgets and for Project enter Payments.
Feel free to skip inviting others to your channel at this time. You should receive an e-mail at the address you used when configuring the workspace. It will contain a URL for your workspace which you will need when configuring the Connector Instance.
Create a Slack Connector Instance
If you haven’t already, log onto the AMPLIFY Platform and navigate to Integration Builder. Click on the Connectors tab and search for the Slack Connector. Hover over the Slack Connector tile and click Authenticate. On the Slack Connector Instance authentication page give it the name Acme Widgets Payments and click Create Instance. A new browser tab or window will pop up asking for the Slack URL for your workspace. Enter the URL you received earlier in an e-mail. Next you will be asked to log in with your Slack account credentials and then allow AMPLIFY Application Integration permission to access your Slack workspace.
You’ve created all the Connector Instances needed for this integration. Let’s move on to building the Flow.
Create a Mapping
When the flow triggers, it will receive a payment object from Quickbooks. This object is large and contains a lot more information than we need, so let’s create a map that will normalize the Quickbooks payment object into something more manageable within our Flow. For another example of a Mapping and more information about the value they provide, look at my article Create a Simple Integration Builder Flow.
From the Integration Builder UI, click on the Mappings tab and then the Build New Mapping button in the top-right corner of the Mappings screen. In the Create a New Mapping dialog, select Build New Resource.
In the Mapping Name and URL field name the map mybillpayment and click the Save button. On the right side of the UI you will now see a section for Mapped Transformations. Click on the Create New Transformation for “mybillpayment” button. In the Select a connector instance… dialog search for your Quickbooks instance in the Connector Instance column and click on it. The right side of the panel will populate with all resources defined within the Quickbooks connector. We want to apply our mapping to the billpayment resource, so search for billpayment and click on it.
We want this mapping to apply only to this instance of our Quickbooks connector, so we will be mapping fields under the Instance Level Fields section. For this example, we will keep it simple and only map two fields. Click the + button next to Instance Level Fields two times. This will create two empty fields. When mapping the fields you provide four pieces of information. The Field Name is the normalized name which will be used in the data model created by this map.
You can refer to the Field Name programmatically in your flow where necessary. The Type defines the type of object you are placing into the field. Display Name is a human friendly name that can help other users understand the map. The final value is the name of the field in the target data model. In this case the Quickbooks billpayment model. Type ahead is enabled here as well as a drop-down so you can search the whole data model in case you don’t know the exact name of the field you are looking for. For this example, configure the map as:

Click the Save button in the top right of the UI.
Now that the mapping has been applied to your Quickbooks Connector instance, a /mybillpayment method will be overlaid onto the API for your connector instance. Go take a look at the API Docs for the connector instance. When calling the Quickbooks Connector instance from a flow, we will call the /mybillpayment method which will cause the mapping to be invoked on top of the underlying Quickbooks /billpayment method.
Note that you can create mapping Fields at the Organizational, Account and Instance level. The levels control granularity of how the mapping is applied to instances in your Application Integration Organization. I won’t go into specific details in this article, bit for more information you can read about mappings in the product documentation.
We now have all the pieces we need to build the business logic to make this integration work.
Create a Flow
From the Integration Builder UI, click on the Flows tab and then the Build New Flow Template button. Next click on Build New Flow. Give your flow a name like Slack Notification of Quickbooks Payment and click Create.
Add a Trigger
We now need to define the trigger which will be used to start the flow. In this case, we want an Event trigger, so click on the Add Event link. For more information on the types of triggers and when you would use them see the Flow Triggers section of the Integration Builder documentation.
Click the + button in the Edit Event Trigger dialog to select a Connector Instance Variable. We don’t have any Flow Variables yet, so click the + button in the Select flow variable dialog to create a new one. We are now prompted for the type of flow variable we want to create. We need a Connector Instance variable, so click the + button next to Connector Instance.
In the Name field enter quickbooks. Using a meaningful name here will help us remember which connector instance we want to associate with this variable later. Clock Save. Back in the Select a flow variable dialog, click on the newly created quickbooks flow variable. The newly created variable should now appear in the Edit event trigger dialog as ${config.quickbooks}. Click Save.
Add some variables
We now see the Flow Template Editor canvas. Before we create any steps we need to add a few more variables first. We already created one for the Quickbooks source so now we need one for the Slack destination. Click the Variables button in the editor. Click the Connector Instance variable type and give it the name slack. Click Save.
Let’s also make this flow template more flexible by parameterizing the Slack channel name. This will allow us to change the destination channel simply by editing a runtime variable instead of having to edit the flow template. Click on the Create New Variable button and click the Value button. Give it a name of channelName and click Save. Back in the Flow Variables dialog, you should see the three variables for this flow. Click Cancel to dismiss the dialog.
Build Flow Steps
The webhook trigger we receive from Quickbooks contains an event ID, but not all of the information about the payment. The first thing we need to do is use the ID we got from the trigger and query Quickbooks for the full details. This is also where the mapping comes into play.
Click the + button below the trigger step in the editor. In the Add a Flow Step dialog, click the Connector API Request link. This allows us to insert a request to Quickbooks through the Connector Instance we configured earlier. Use this configuration:
Name: GetPaymentDetails
Connector Instance Variable (click the + button to bring up the list of variables to choose from): ${config.quickbooks}
Method: GET
API: /mybillpayments
Click Save.
Now we have the details about the payment we are interested in. Remember, we used our map, so we have amount and vendorName from the full Quickbooks payment details. Next, we need to build the text of the message we want to display in the Slack channel. Slack the slack messages API expects the body to be in the format {“text” : “Some string”}, so let’s build that.
Click on the GetPaymentDetails step in the flow editor and select Add Onsuccess. Add a JS Script flow step. Give it a Name of CreateSlackMessage and enter the following code snippet in the editor window.
done(
{"text" : "You made a payment of $" + steps.GetPaymentDetails.response.body.amount + " to " + steps.GetPaymentDetails.response.body.vendorName + "."}
)
Click Save.
We now have a properly formatted message, so let’s send it to Slack. Click on the CreateSlackMessage step and select Add Onsuccess. Add a Connector API Request step and configure:
Name: PostToSlack
Connector Instance Variable: ${config.slack}
Method: POST
API: /channels/${config.channelName}/messages
Click on the Show Advanced button.
Body: ${steps.CreateSlackMessage}
Click Save.
A few things to explain here. We use ${config.channelName} here to dynamically insert the value of the channelName variable at runtime. The value will be defined in a bit when we create a Flow Instance. By placing ${steps.CreateSlackMessage} into the Body field we are telling the flow to insert the result of the CreateSlackMessage step (the contents of the done() function) into the body of the API request.
That’s it!
Create a Flow Instance
In the previous steps we created a Flow Template. Remember, we included a few variables. When we create an instance of the flow, we define exactly which Connector Instances to invoke at runtime as well as the values for any flow variables we created.
Click on the Flows tab in the Integration Builder UI. This will take us to the list of Flow Templates in our organization. Hover over the Slack Notification of Quickbooks Payment flow template tile and click Create Instance. Give the flow instance a name. Since I am getting notifications from my Acme sandbox company in Quickbooks, I’ll name it Acme Bill Payment Notification.
Under the Variables, click the + next to the quickbooks connector instance variable and select the Quickbooks Connector Instance you configured earlier. Do the same for the slack connector instance variable, this time selecting the Slack Connector Instance. For the channelName provide the value payments.
Click Create Instance.
We are now set up to receive webhook notifications from our Quickbooks connector, format the Quickbooks bill payment details into a Slack message and post that message to the Payments channel of our Slack workspace.
Testing
Log into your Quickbooks developer account and navigate to your sandbox company. Refer to the previous article in this series if you need a refresher on the Quickbooks UI. NAvigate to Expenses -> Vendors. When the sandbox company was created Quickbooks populated it with sample data. In the list of vendors look for one that has a positive number in the open balance field and click on the Make payment button.
In this example, I will select Brosnahan Insurance Agency simply because it is at the top of the list. In the amount field, enter the amount to pay. I enter $50.25 and click Save and close.

It will take a few moments for the Application Integration flow to process. In the meantime, navigate to your Slack workspace and go to the #payments channel. If it isn’t there already, you should soon see a message stating that a payment was made.

Congratulations!
Conclusion
In this article, we covered how to use a webhook alert to trigger an Application Integration flow, use a Mapping to normalize large API responses objects into manageable data objects, format a text message body to use in an API call and use flow variables to control runtime behavior.
Use this knowledge to build your own AMPLIFY Application Integration flows.
Learn more about AMPLIFY Application Integration and sign up for your free trial here!
Follow us on social