
Editor’s Note: This and all further updates to internationalization can be found in the wiki.
In the wiki we have pretty extensive documentation on internationalization of application resources. One thing that has been a little tricky for some developers, though, is changing the actual application name based on locale.
For example, say you had an application named “Cat”, but you wanted it to be “Gato” in Spanish locales, “猫” in Japanese, and so on. Let ‘s see how you would prepare your application to display its name appropriately for both iOS and Android distributions.
Changing Locale for Testing
Before learning to configure your apps to use localized strings for application names, let’s first see how we can change locales manually for testing. Below you can find short videos for both iOS and Android that show you exactly how to do that.
iOS App Name Localization
For iOS it’s pretty simple. Use the standard method for creating localization paths, which means creating and using the i18n directory like this (details here):
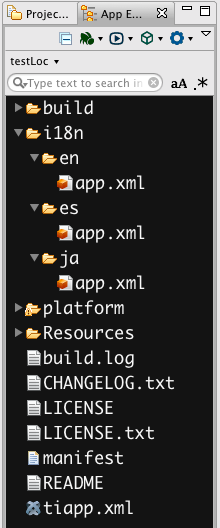
In each of your language directories under i18n, you’ll include an app.xml file that includes the necessary XML structure for defining the localized name of your app. That structure will look like his for each file:
i18n/en/app.xml, i18n/es/app.xml, i18n/ja/app.xml
And that’s it. The next time you build your application, these localized strings will be used for your application name. If everything was configured correctly, you’ll see the app name has changed based on the selected locale.
Android App Name Localization
In its current state, Android app name localization is a little more involved. First, we need to create language-specific resource folders explicitly for Android. To do so, we will create the platform/android/res/values-(language code) directory structure, like this:
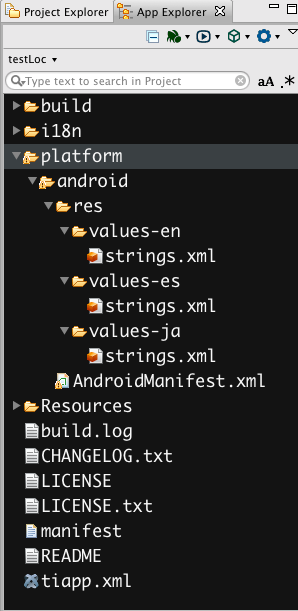
You’ll notice in this case we are creating the Android native strings.xml files, rather than the app.xml files used by iOS. While the file names are different, the contents will be identical to those in the iOS files seen above.
Aside from the strings.xml files, there’s one more thing we need to add. To make your app use these localized strings, you need to modify the existing AndroidManifest.xml. In order to do that, We need to add that custom manifest file, seen in the picture above at platform/android/AndroidManifest.xml. The AndroidManifest.xml file placed here should be a copy of the generated AndroidManifest.xml file found in your project’s build/android directory. For more details on custom AndroidManifest.xml files, check out this wiki entry on the topic.
Now open up platform/android/AndroidManifest.xml and change the android:label attributes of the <application> and <activity> elements from the defined value of your app name to the value @string/app_name. Yeah, that was a lot of instructions all in one sentence, so here’s a gist to show you what I mean:
With these changes in place, you can now rebuild your app (probably best to give it a clean first) and you’ll have a successfully localized application name.
For Reference…
This is how your home screens might look on Android and iOS when Japanese is the selected language.
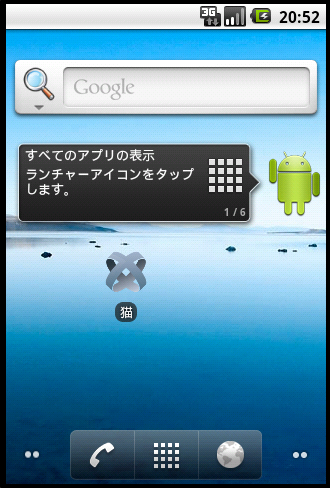 | 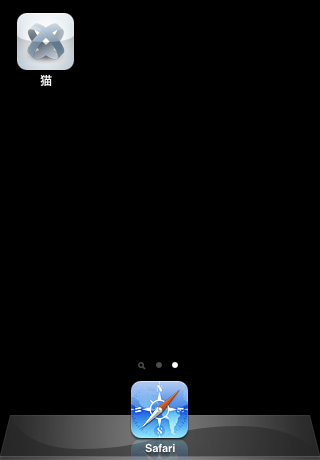 |
And just in case my description was clear as mud, check out a Titanium project with these localizations set up first hand. Just go to the AppNameLocalization project repository on Github. It contains the very basic project discussed here. With all this, you should be well-equipped to distribute your apps in as many languages as you wish to support.
Links
- AppNameLocalization project on Github
- Appcelerator Wiki: Internationalization
- Appcelerator Wiki: Maintaining a Custom AndroidManifest.xml
Follow us on social