
In this blog post, we’ll look at how to make an API call to a REST API service, the Petstore API, using the OpenAPI Client Connection. As described in the last post, Getting Started with Amplify Integration – HTTPS Client Connection to REST APIs, if our REST API does not have an OpenAPI specification we can use an Amplify Integration HTTP/S Client Connection, but the Petstore API does have one, so we’re in luck.
This blog post is the seventh in the “Getting Started with Amplify Integration” blog post series and builds on the knowledge gained prior. As such not all steps will be explicitly called out since they are already covered in prior posts.
You can view the technical online documentation for Amplify Integration here and you can register for a free Introduction to Amplify Integration online course at Axway University here.
In order to follow this blog post, you will need access to Amplify Integration.
Create an integration
- Create an integration with a 60 second Scheduler event trigger and add an OpenAPI Client Invoke Operation component
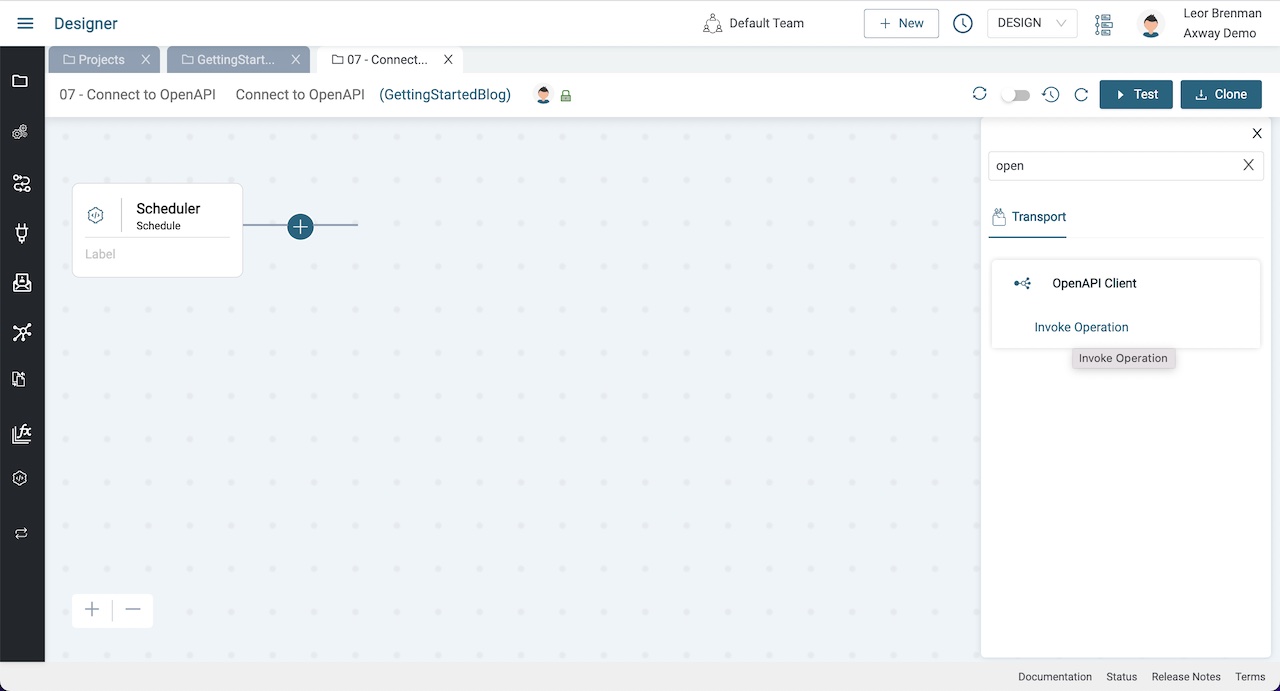
- Expand the bottom panel and click Add next to Connection to add a new OpenAPI Client Connection
- Give the Connection a name and description (e.g. Petstore)
Head on over to the Swagger Petstore – OpenAPI API and review the documentation.
Now we have the info we need to setup the OpenAPI Client Connection and use it in an OpenAPI Client component to call the API.
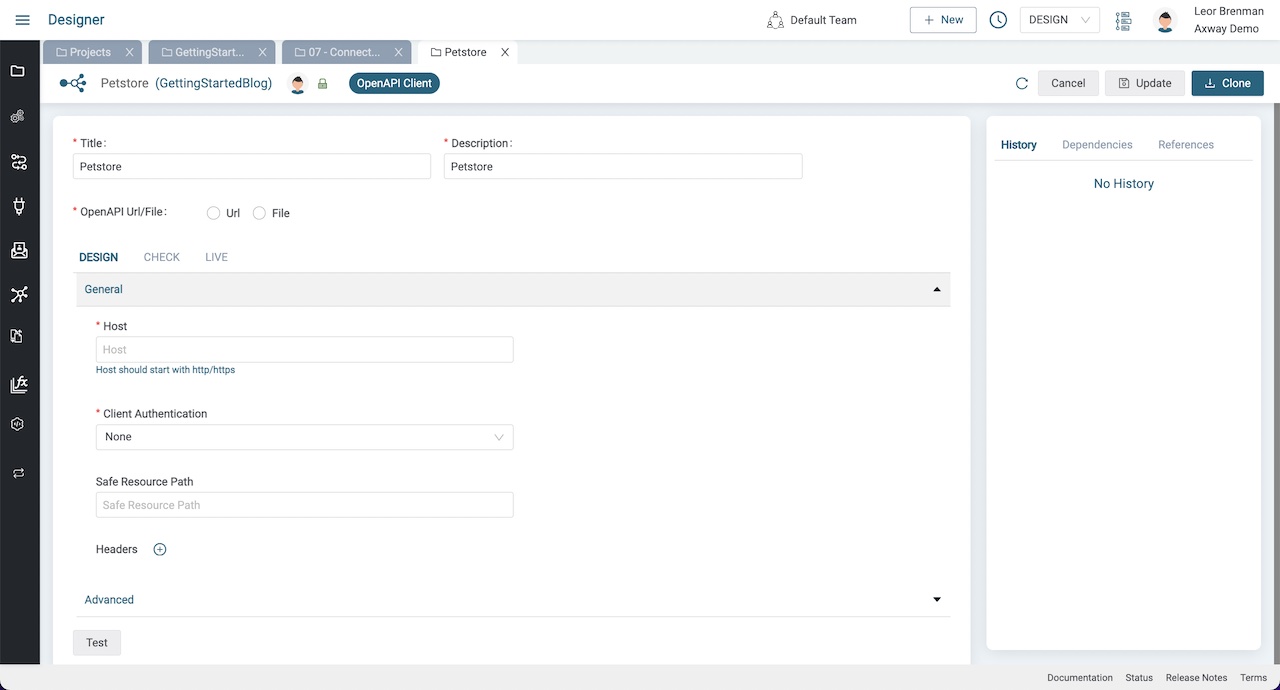
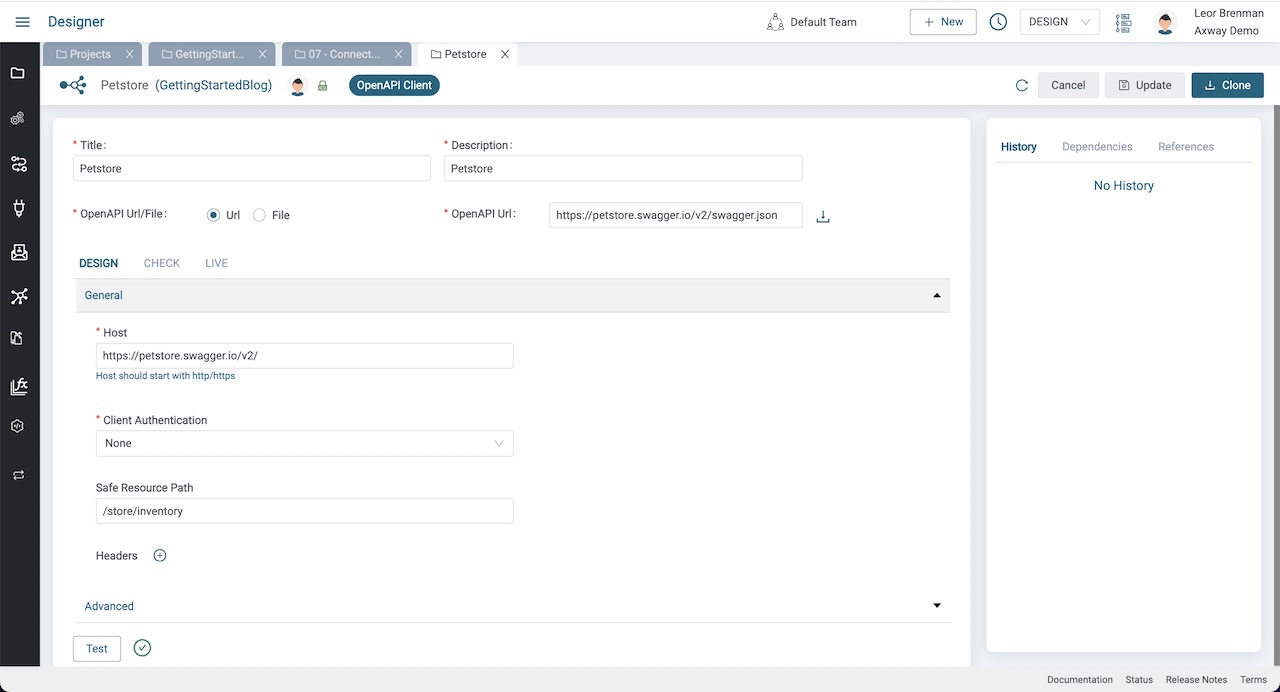
Configure the connection
- Set OpenAPI Url/File to
Url - Enter
https://petstore.swagger.io/v2/swagger.jsonfor OpenAPI Url - Enter
https://petstore.swagger.io/v2/for the Host - Leave Client Authentication as
None - Set Safe Resource Path to
/store/inventory - Click Update and Test
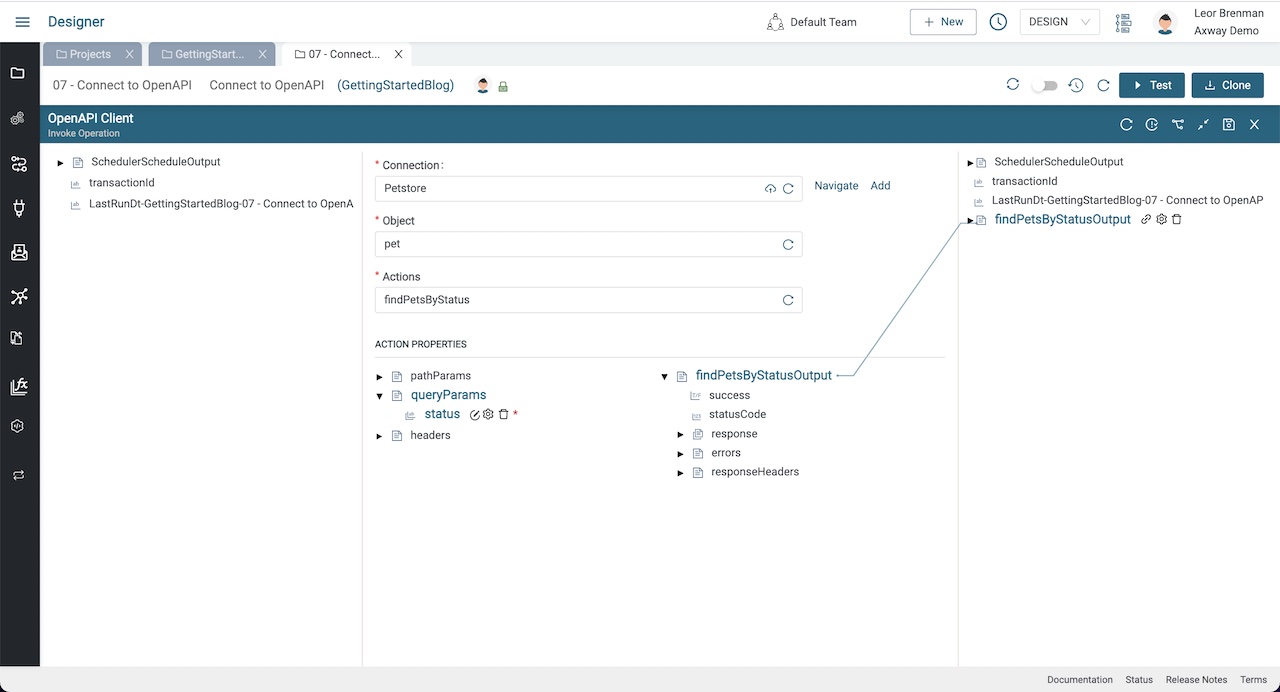
Configure the OpenAPI Client Component
Return to the integration and click on the OpenAPI Client Component and expand the bottom panel
- Refresh the Connection picker and select the Petstore OpenAPI Client Connection we just created above
- Select pet from the Object picker
- Select findPetsByStatus from the Actions picker
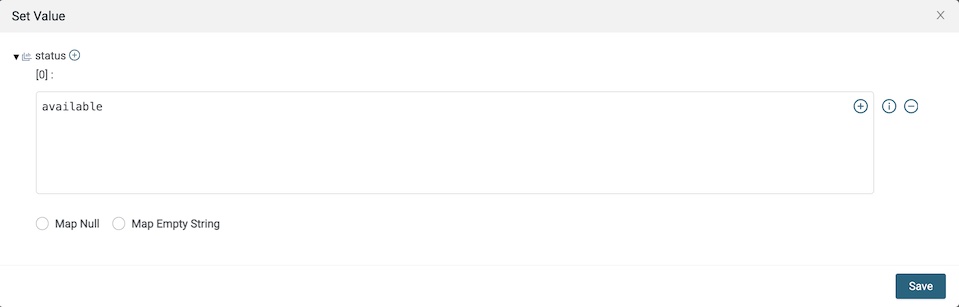
- Expand queryParams under Action Properties and right click on status and select Set Value. Click the plus icon and enter
availableand press Save
- Click the Save icon on the bottom panel
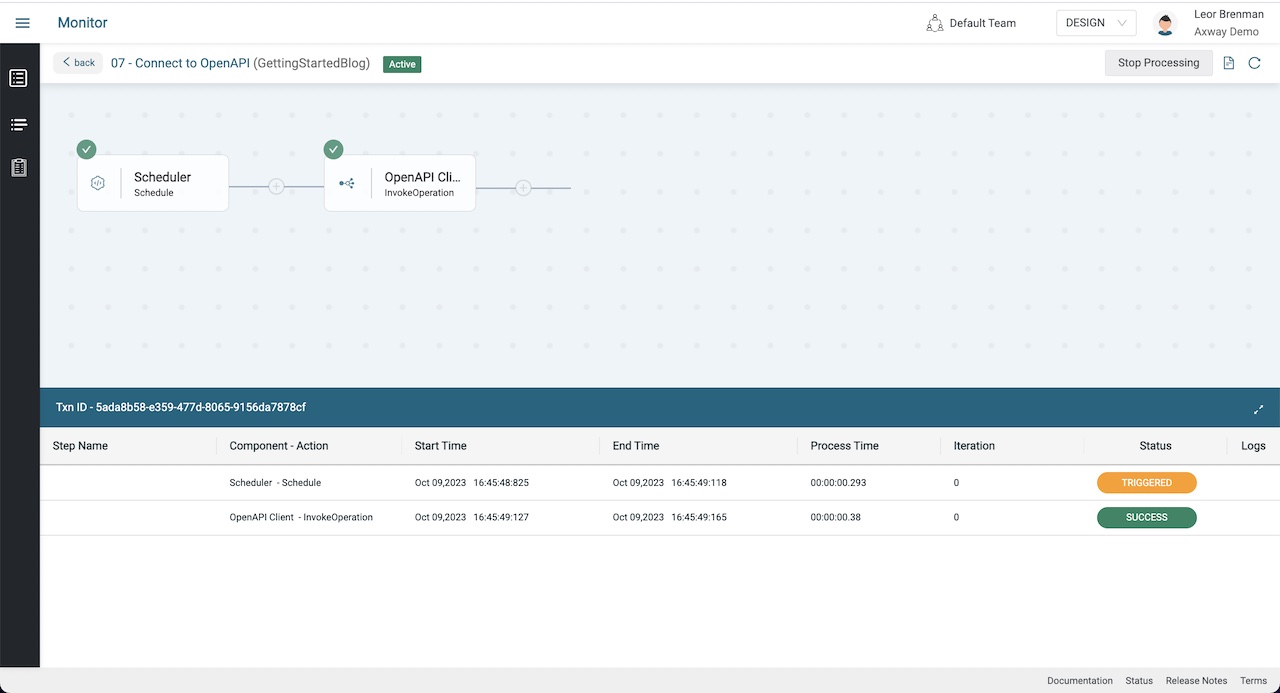
Test the integration
Click the Test button to test your integration. Click on the OpenAPI Client – InvokeOperation step of the transaction in the Monitor tab that automatically opened when you clicked test to view the results of our API call.
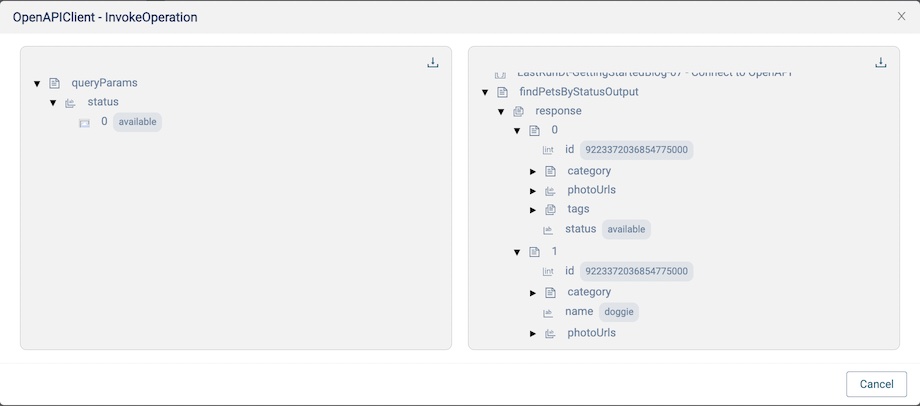
You can see the array of available pets in the output.
Summary
In this blog post we created an OpenAPI Client Connection to the Petstore API and used the connection in an integration.
In future blog posts, we’ll build on our knowledge and explore more of the features of Amplify Integration to create no code integrations.
Dive deeper into what’s possible with Amplify Integration.
Follow us on social