
My colleague, Daniel Wille, described how to authenticate an Integration Builder Jira On-Premise Connector in his recent blog post. In this post, we’ll look at authenticating a Jira Cloud connector.
Create a Jira Developer Account and Instance
- Go to http://go.atlassian.com/cloud-dev and create a new developer account and instance.
- Once your instance is ready, sign in, and complete the setup wizard.
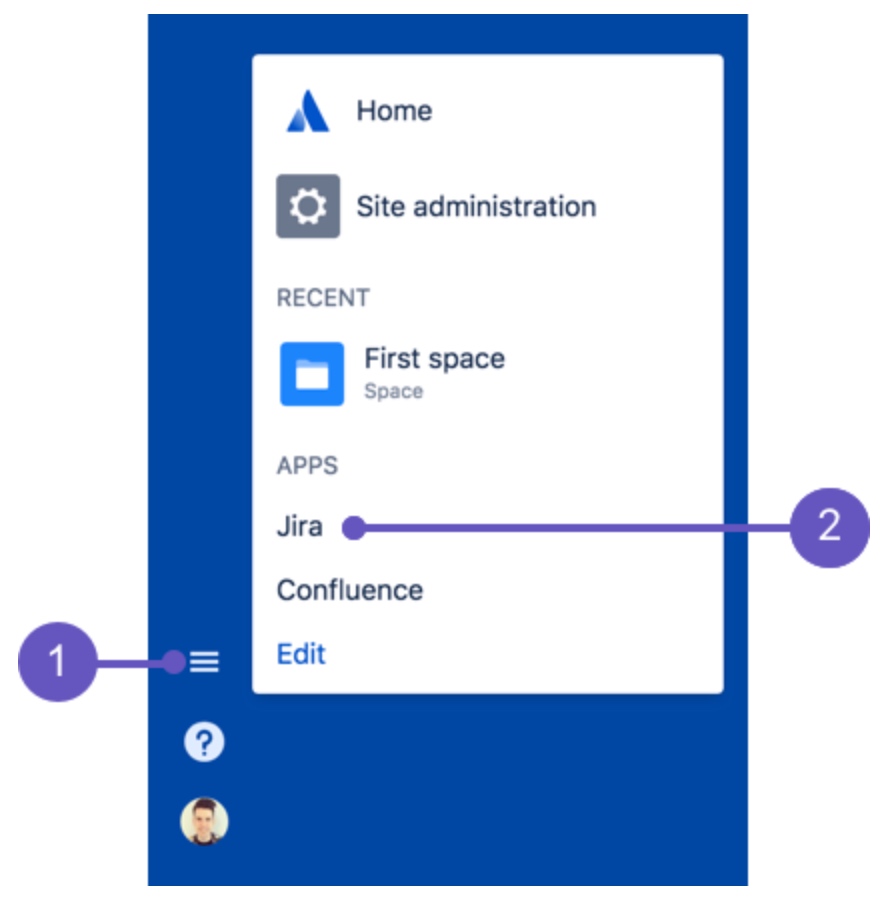
- If needed, use the app switcher to navigate to Jira. Select the app switcher icon (1) and then choose Jira (2).
Note that as part of the setup you will specify an URL for your instance. We’ll need this later when we authenticate our Integration Builder Jira connector. Mine is https://lbrenman.atlassian.net/
- When you are done, your instance should look similar to the screenshot below:
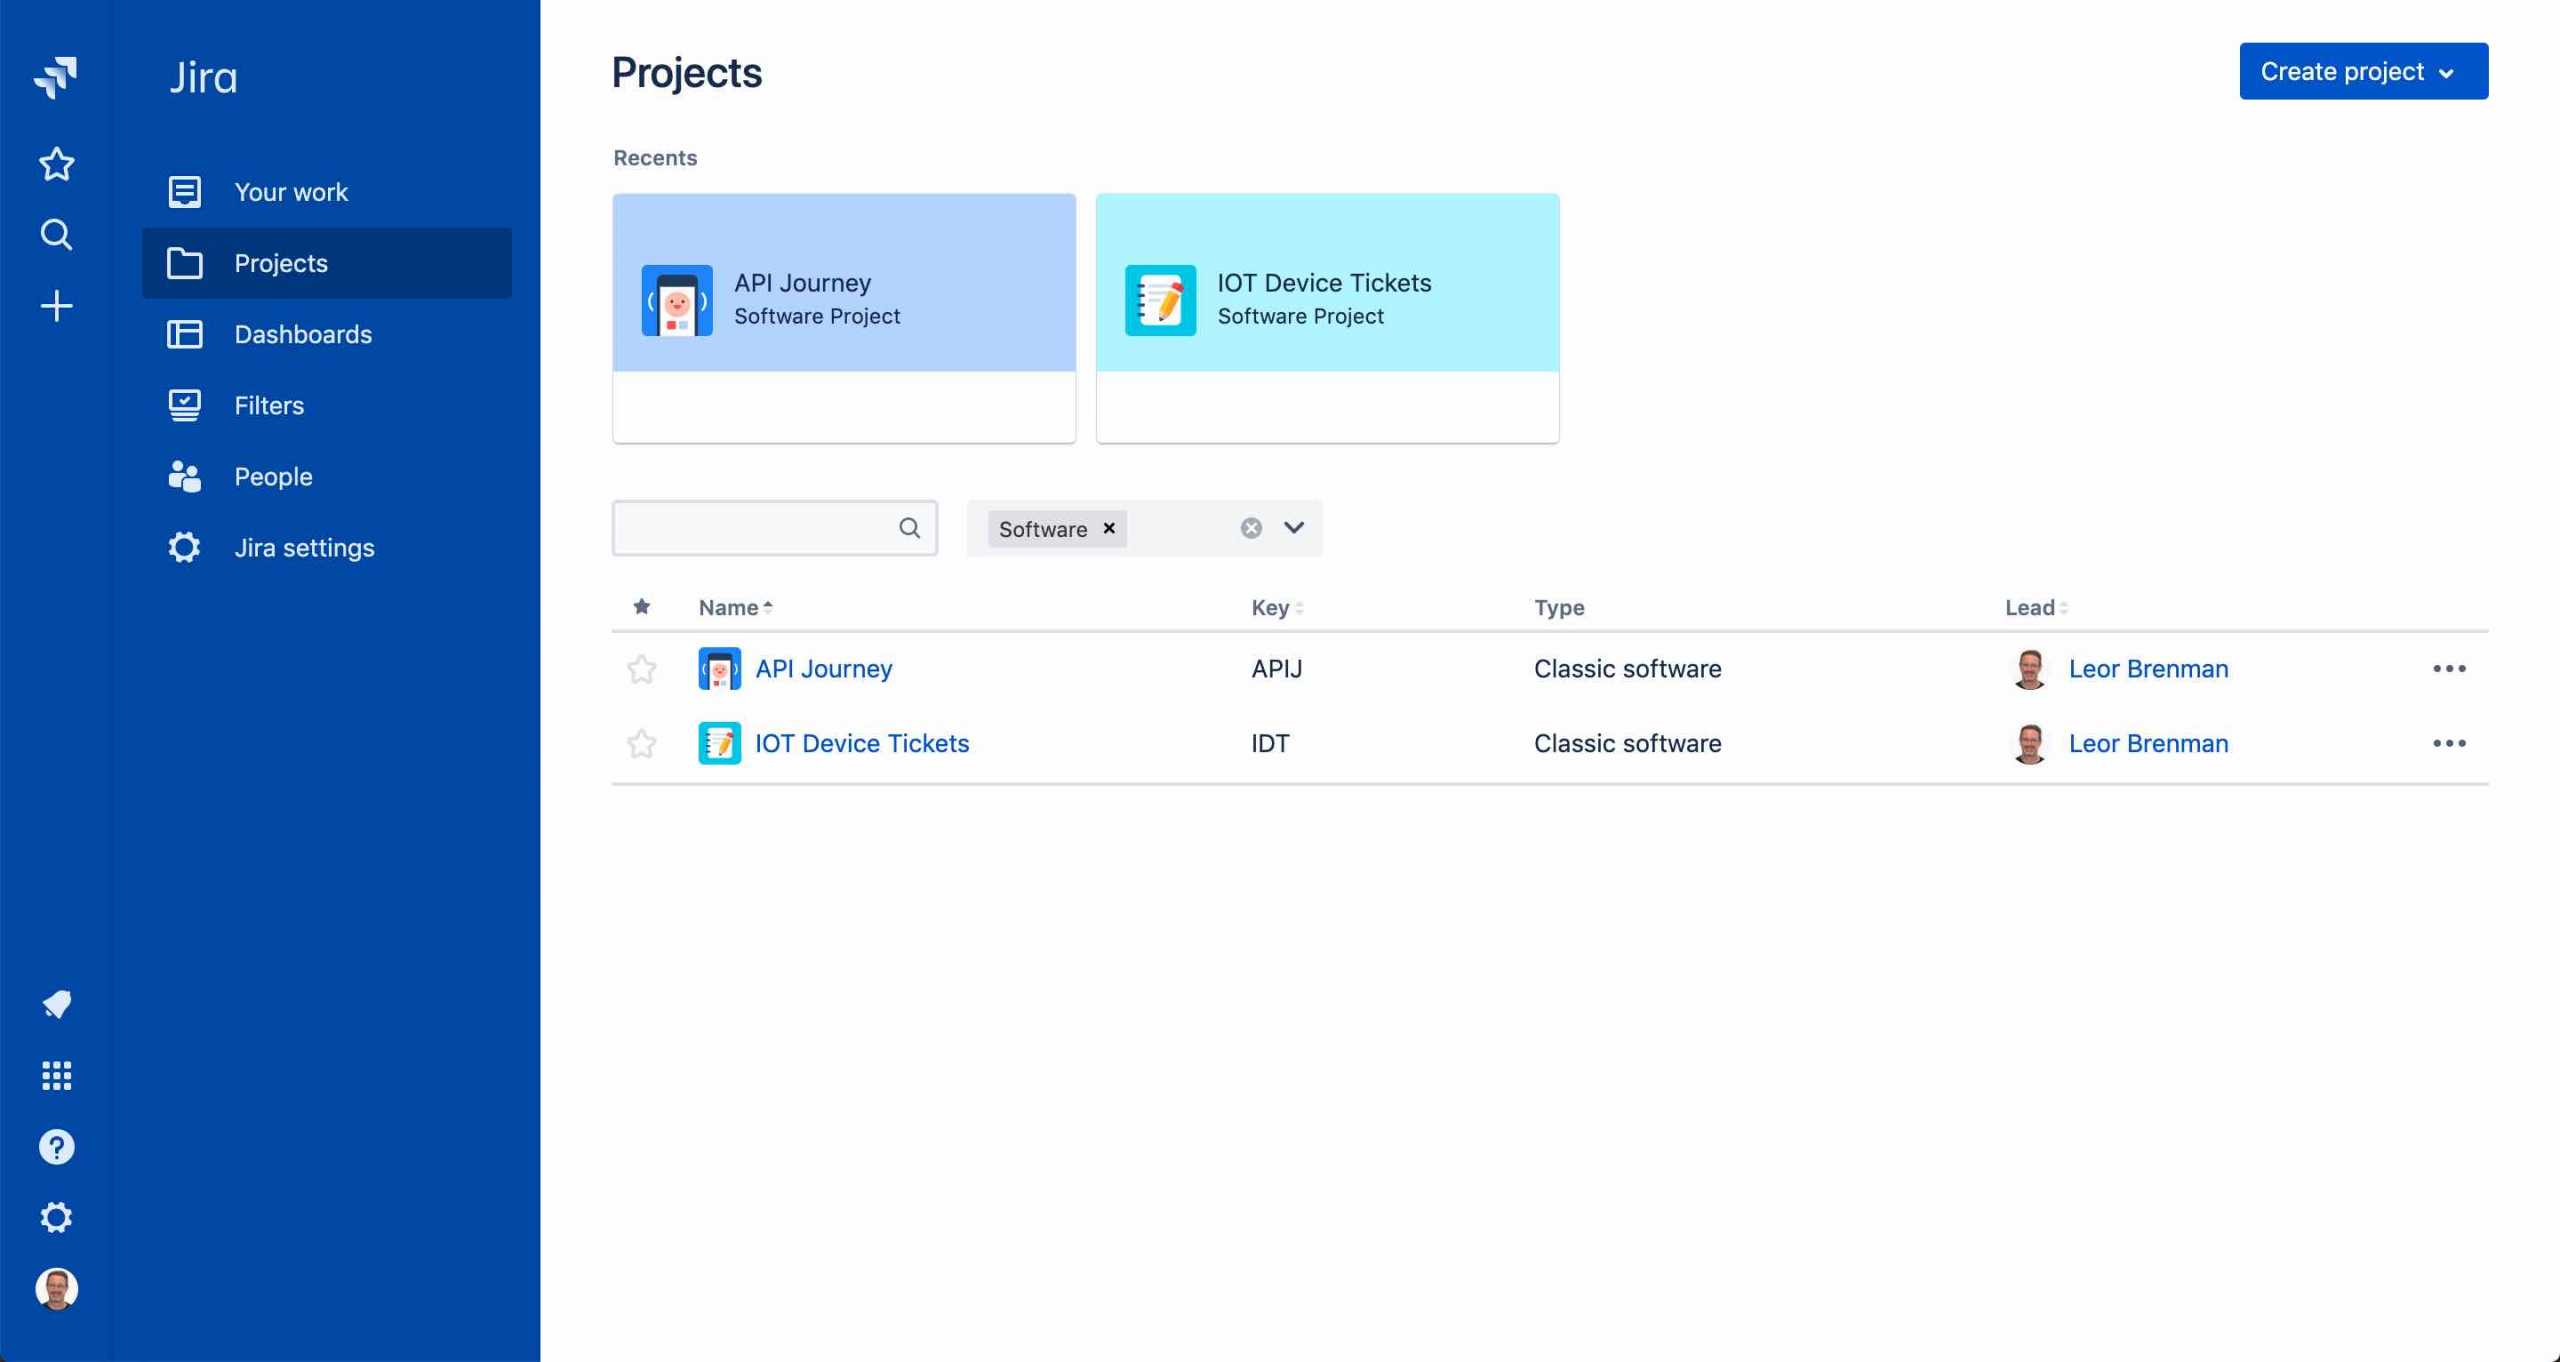
Note that I have two projects created and your interface will be empty as you have created no projects.
- Create a Project and Add an Incident by clicking on the plus sign (+) in the left menu
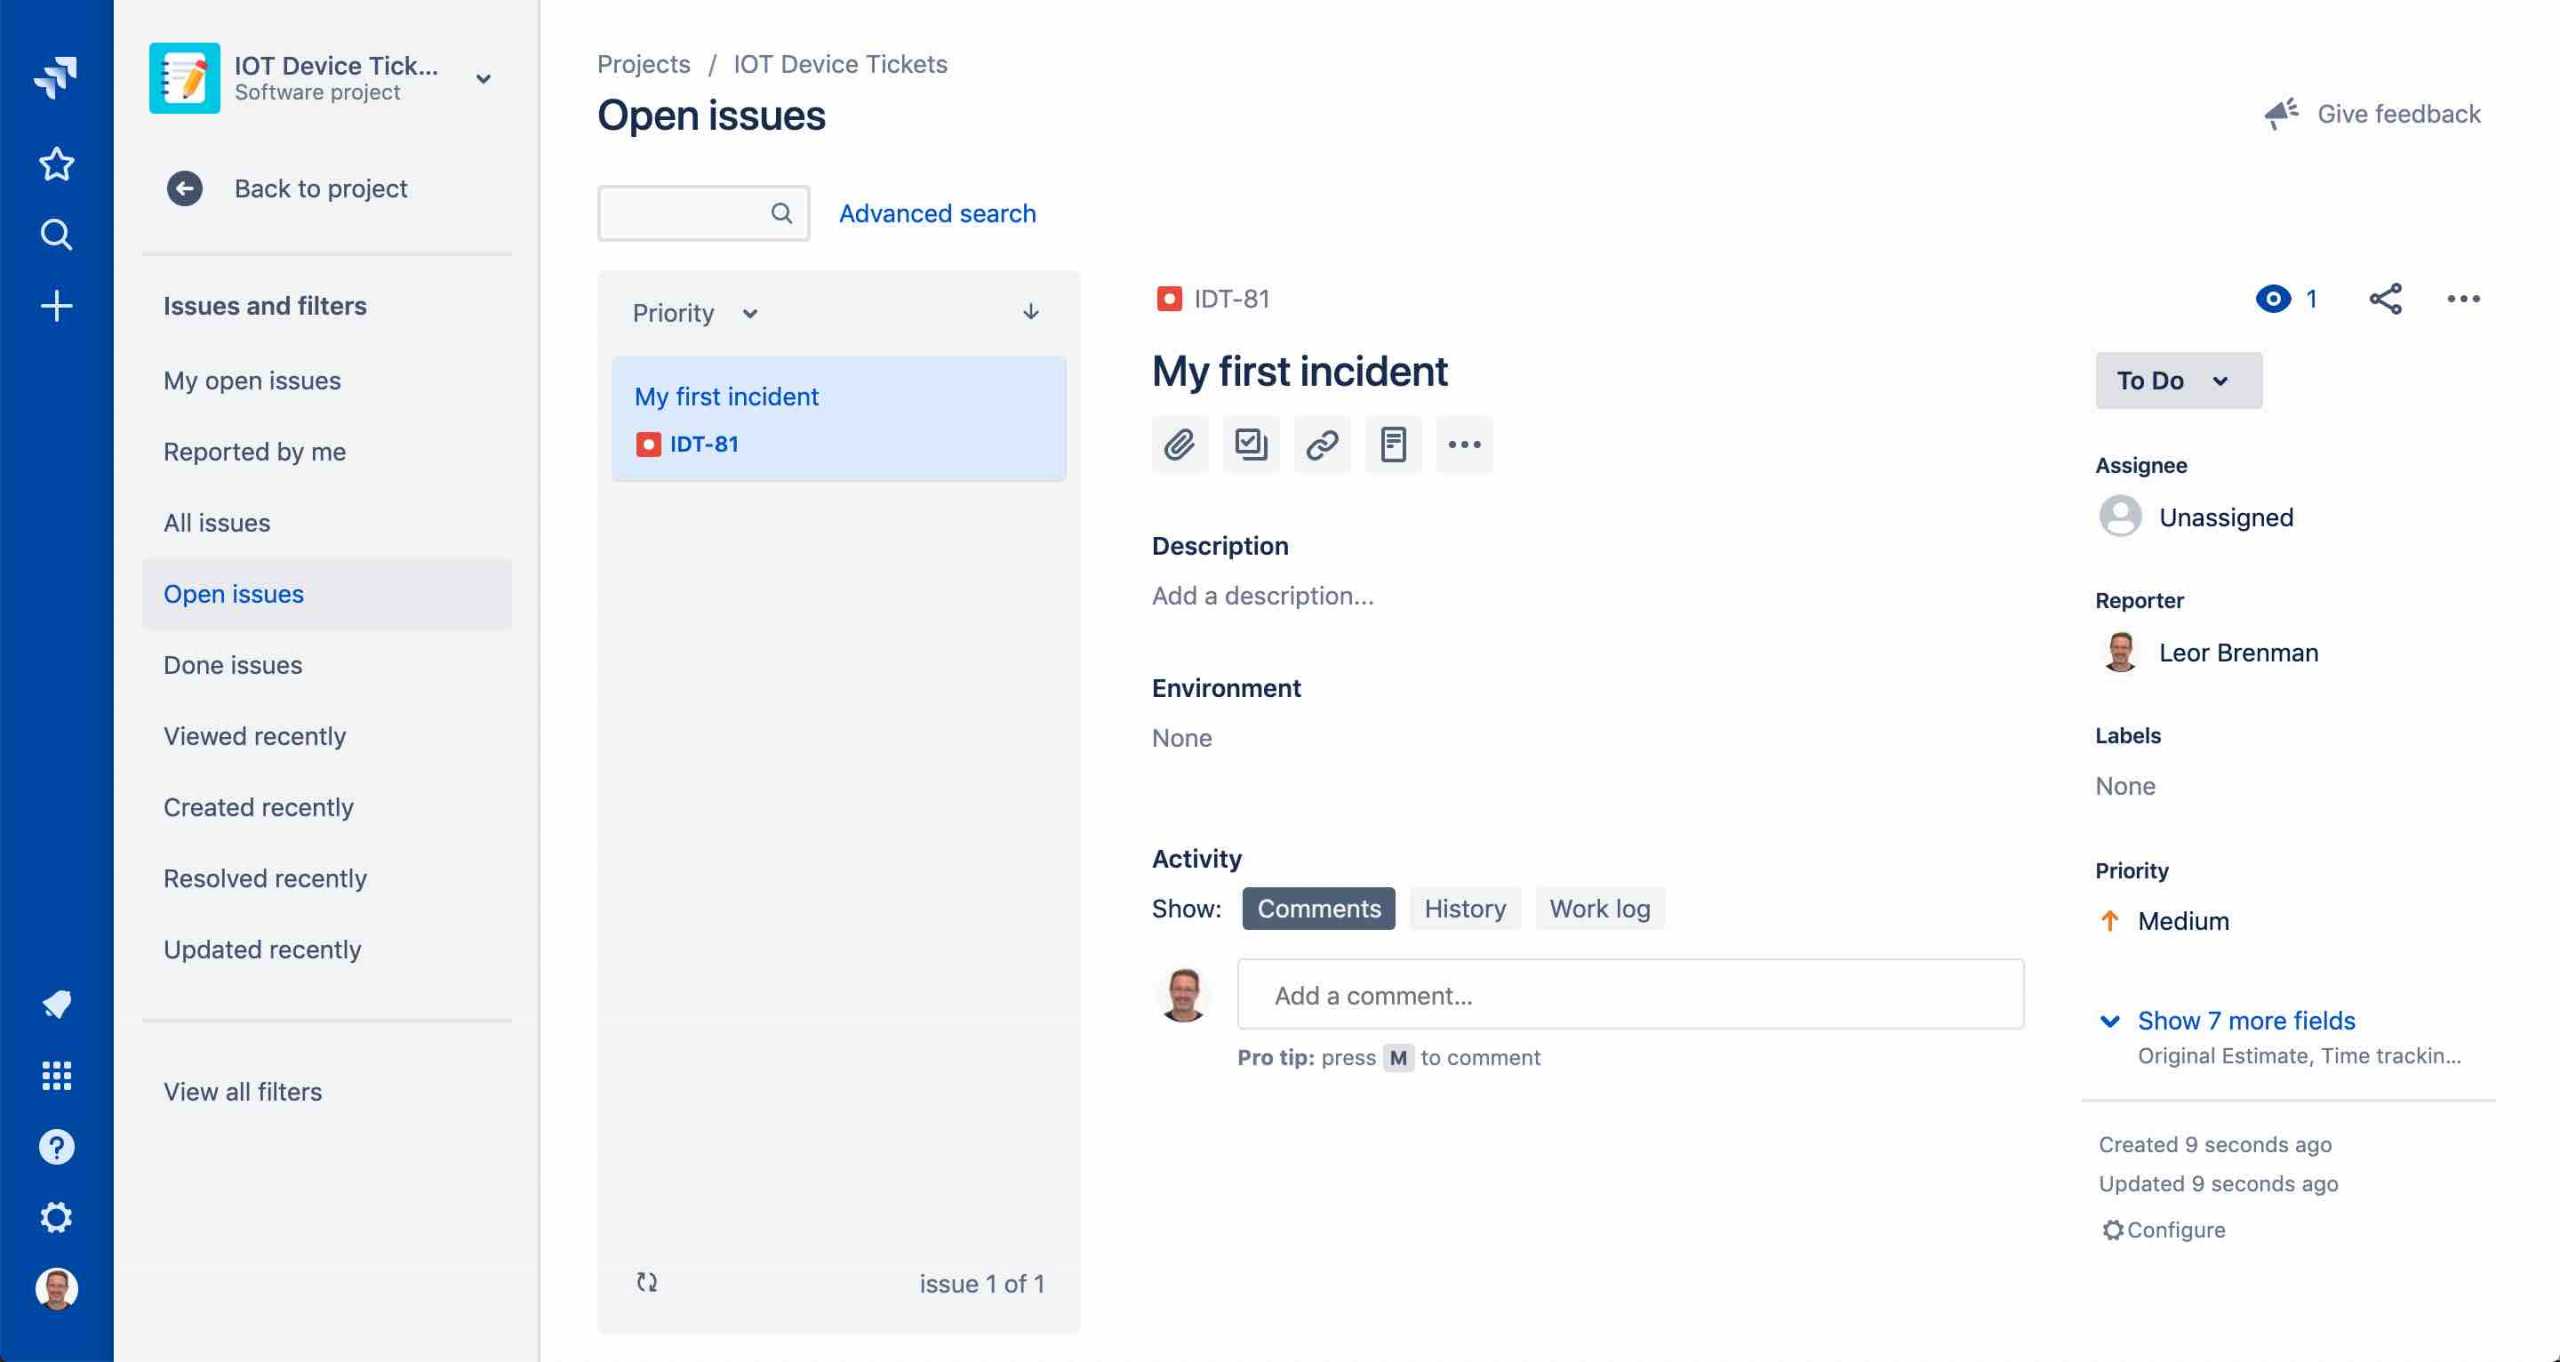
Note the incident id of the incident you just created. In my example above, you can see the id of my incident is IDT-81. In this case, IDT is my project key/id and IDT-81 is my incident key/id. We may need the project key when querying the incidents using the connector.
Authenticate Your Integration Builder Jira Connector
You can find documentation on the Jira connector here.
- Go to Integration Builder and click on Connectors and find the Jira tile (not Jira On-Prem) and click on Authenticate.
- Enter a name for your connector instance, your username (email address), password and Server URL (that you specified when creating your developer Jira instance).
- If you clicked the Log in with the Google button in order to sign in to Jira or if you otherwise know that your Jira user identity is provided through Google, you must use an API token to authenticate the Jira instead of your user password as described here.
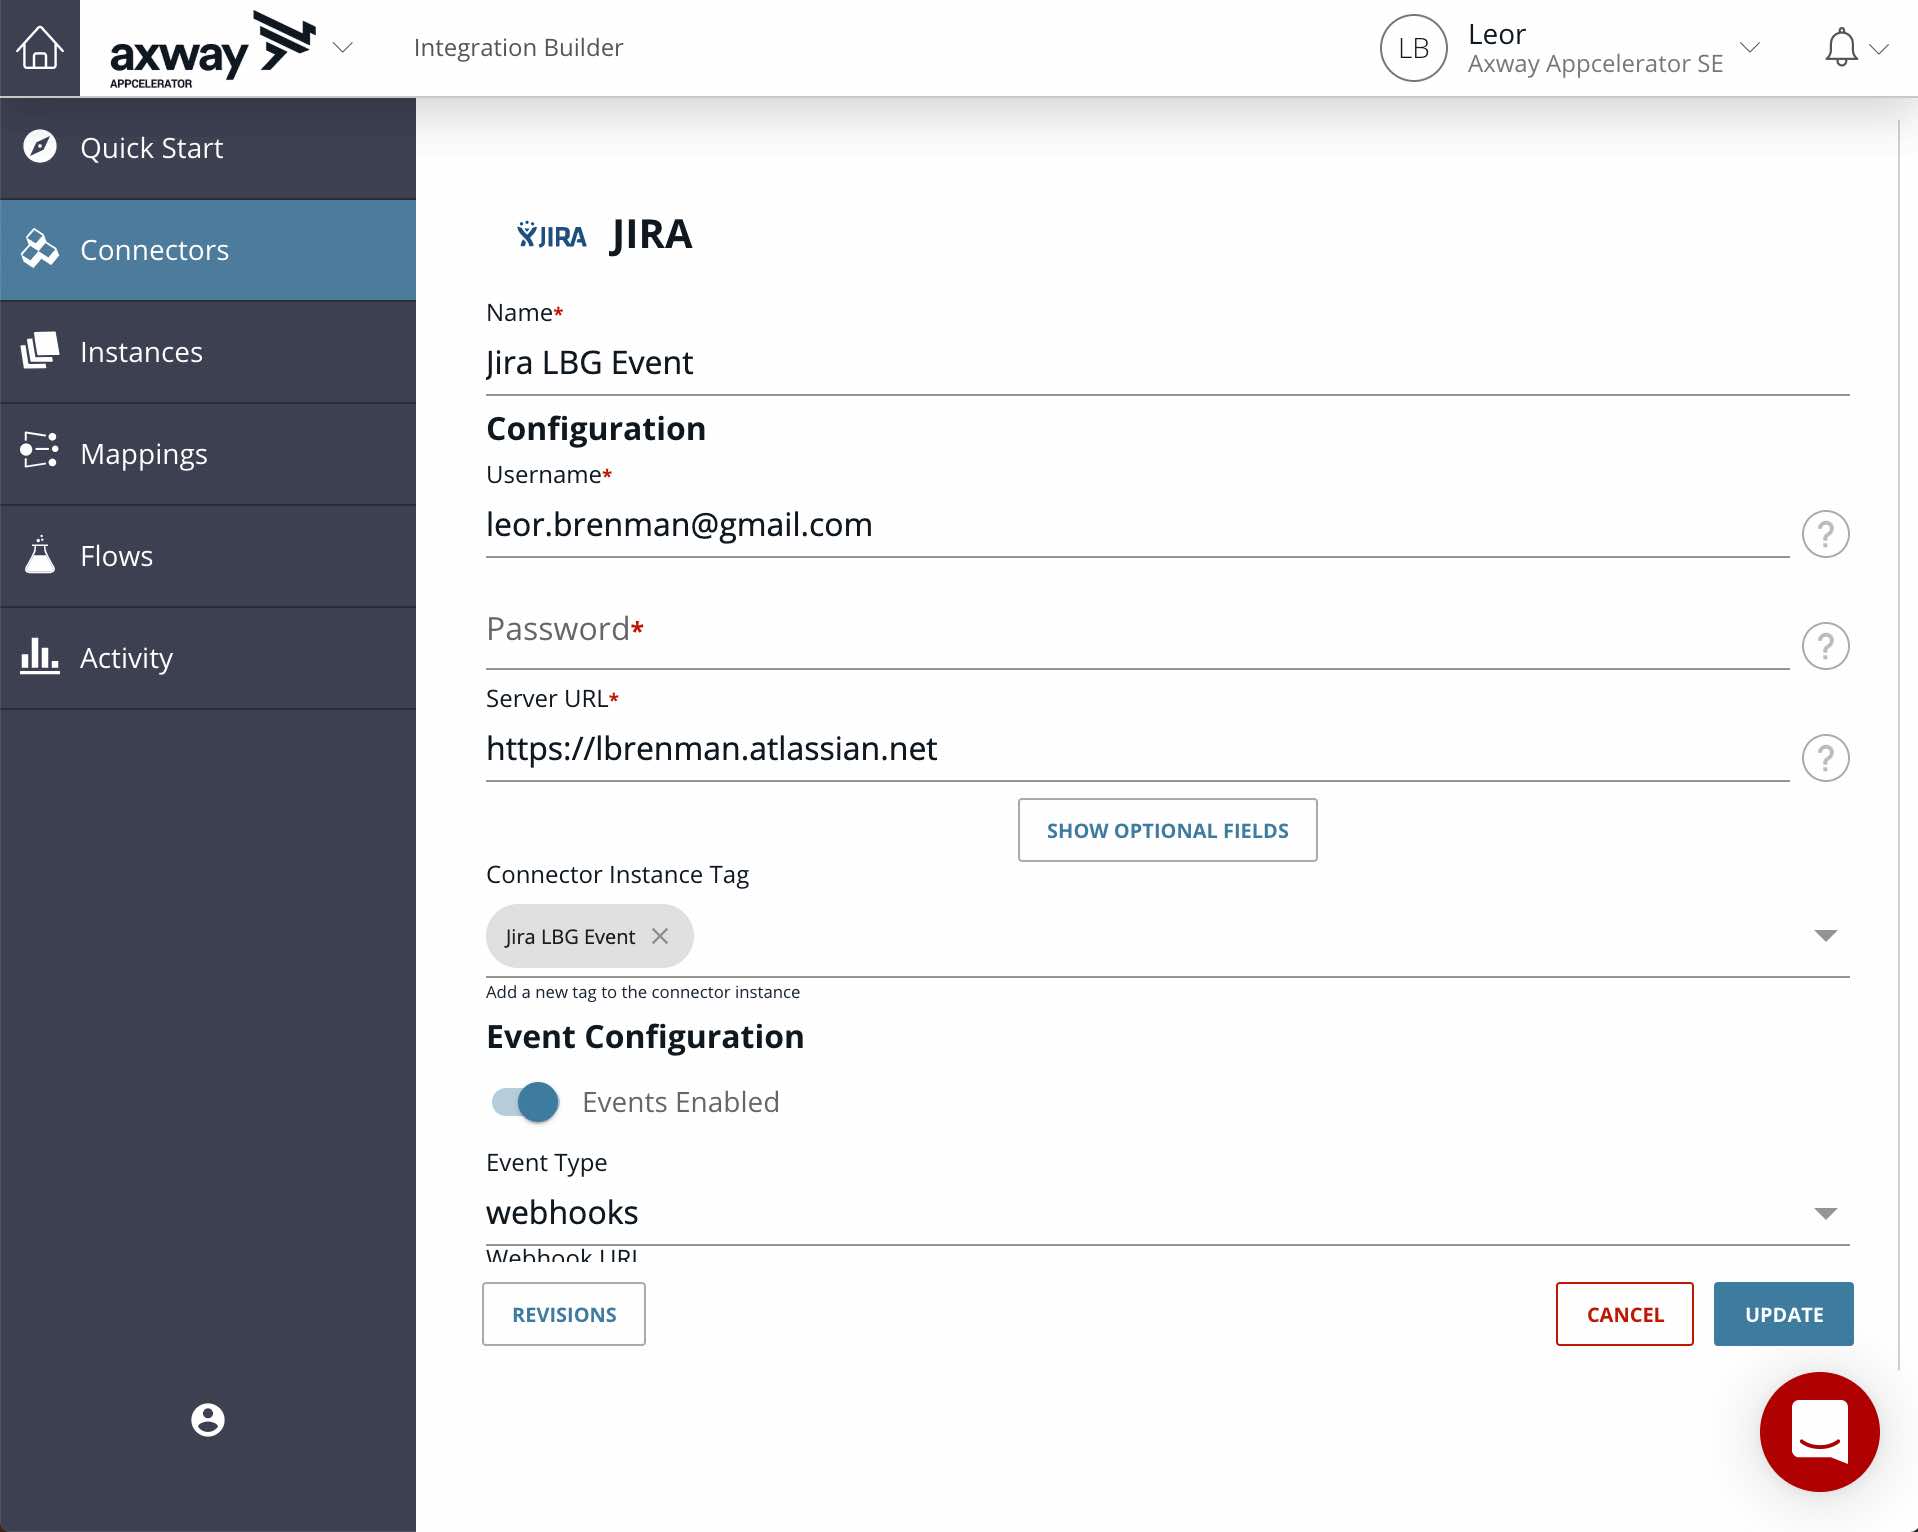
Note that you can enable Events using Webhooks (as I’ve done above) if your flow is triggered by a Jira connector event. No extra parameters are required to be entered for enabling webhooks.
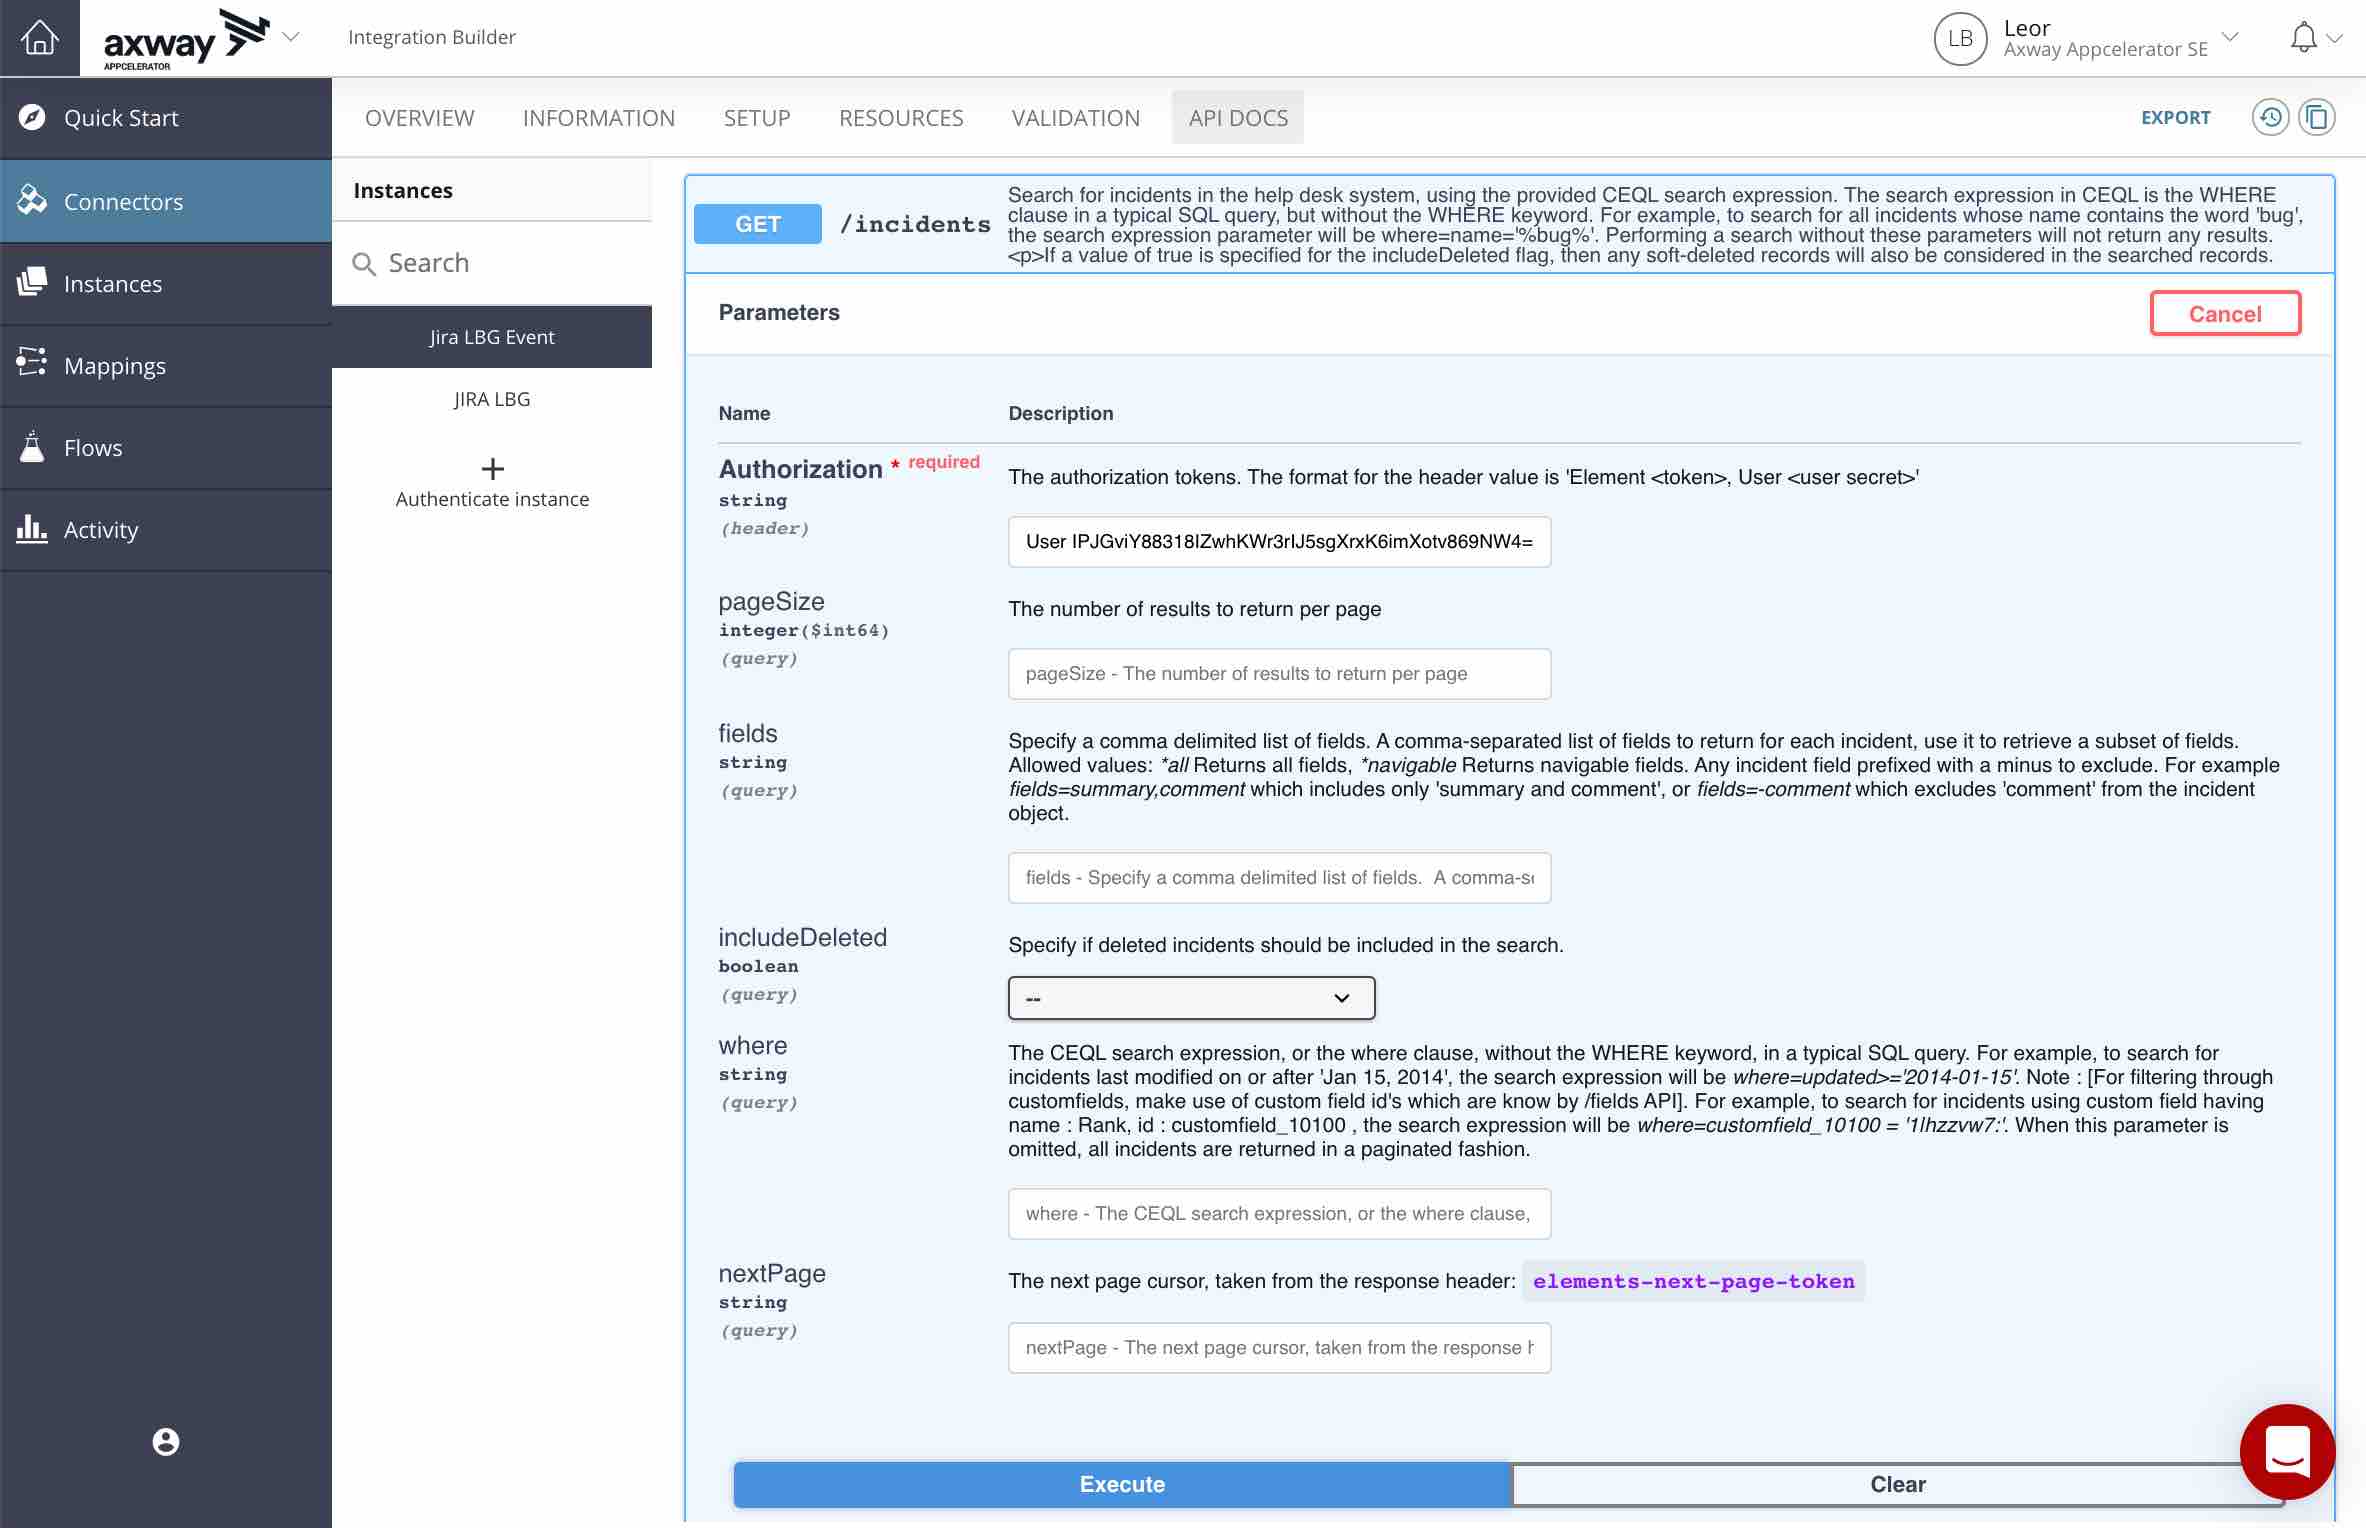
Test the Jira Connector
- Go back to the Jira connector instance tab and select API Docs.
- Scroll down to the GET /incidents API and select Try it out and click on Execute.
- You should see the incident you created above.
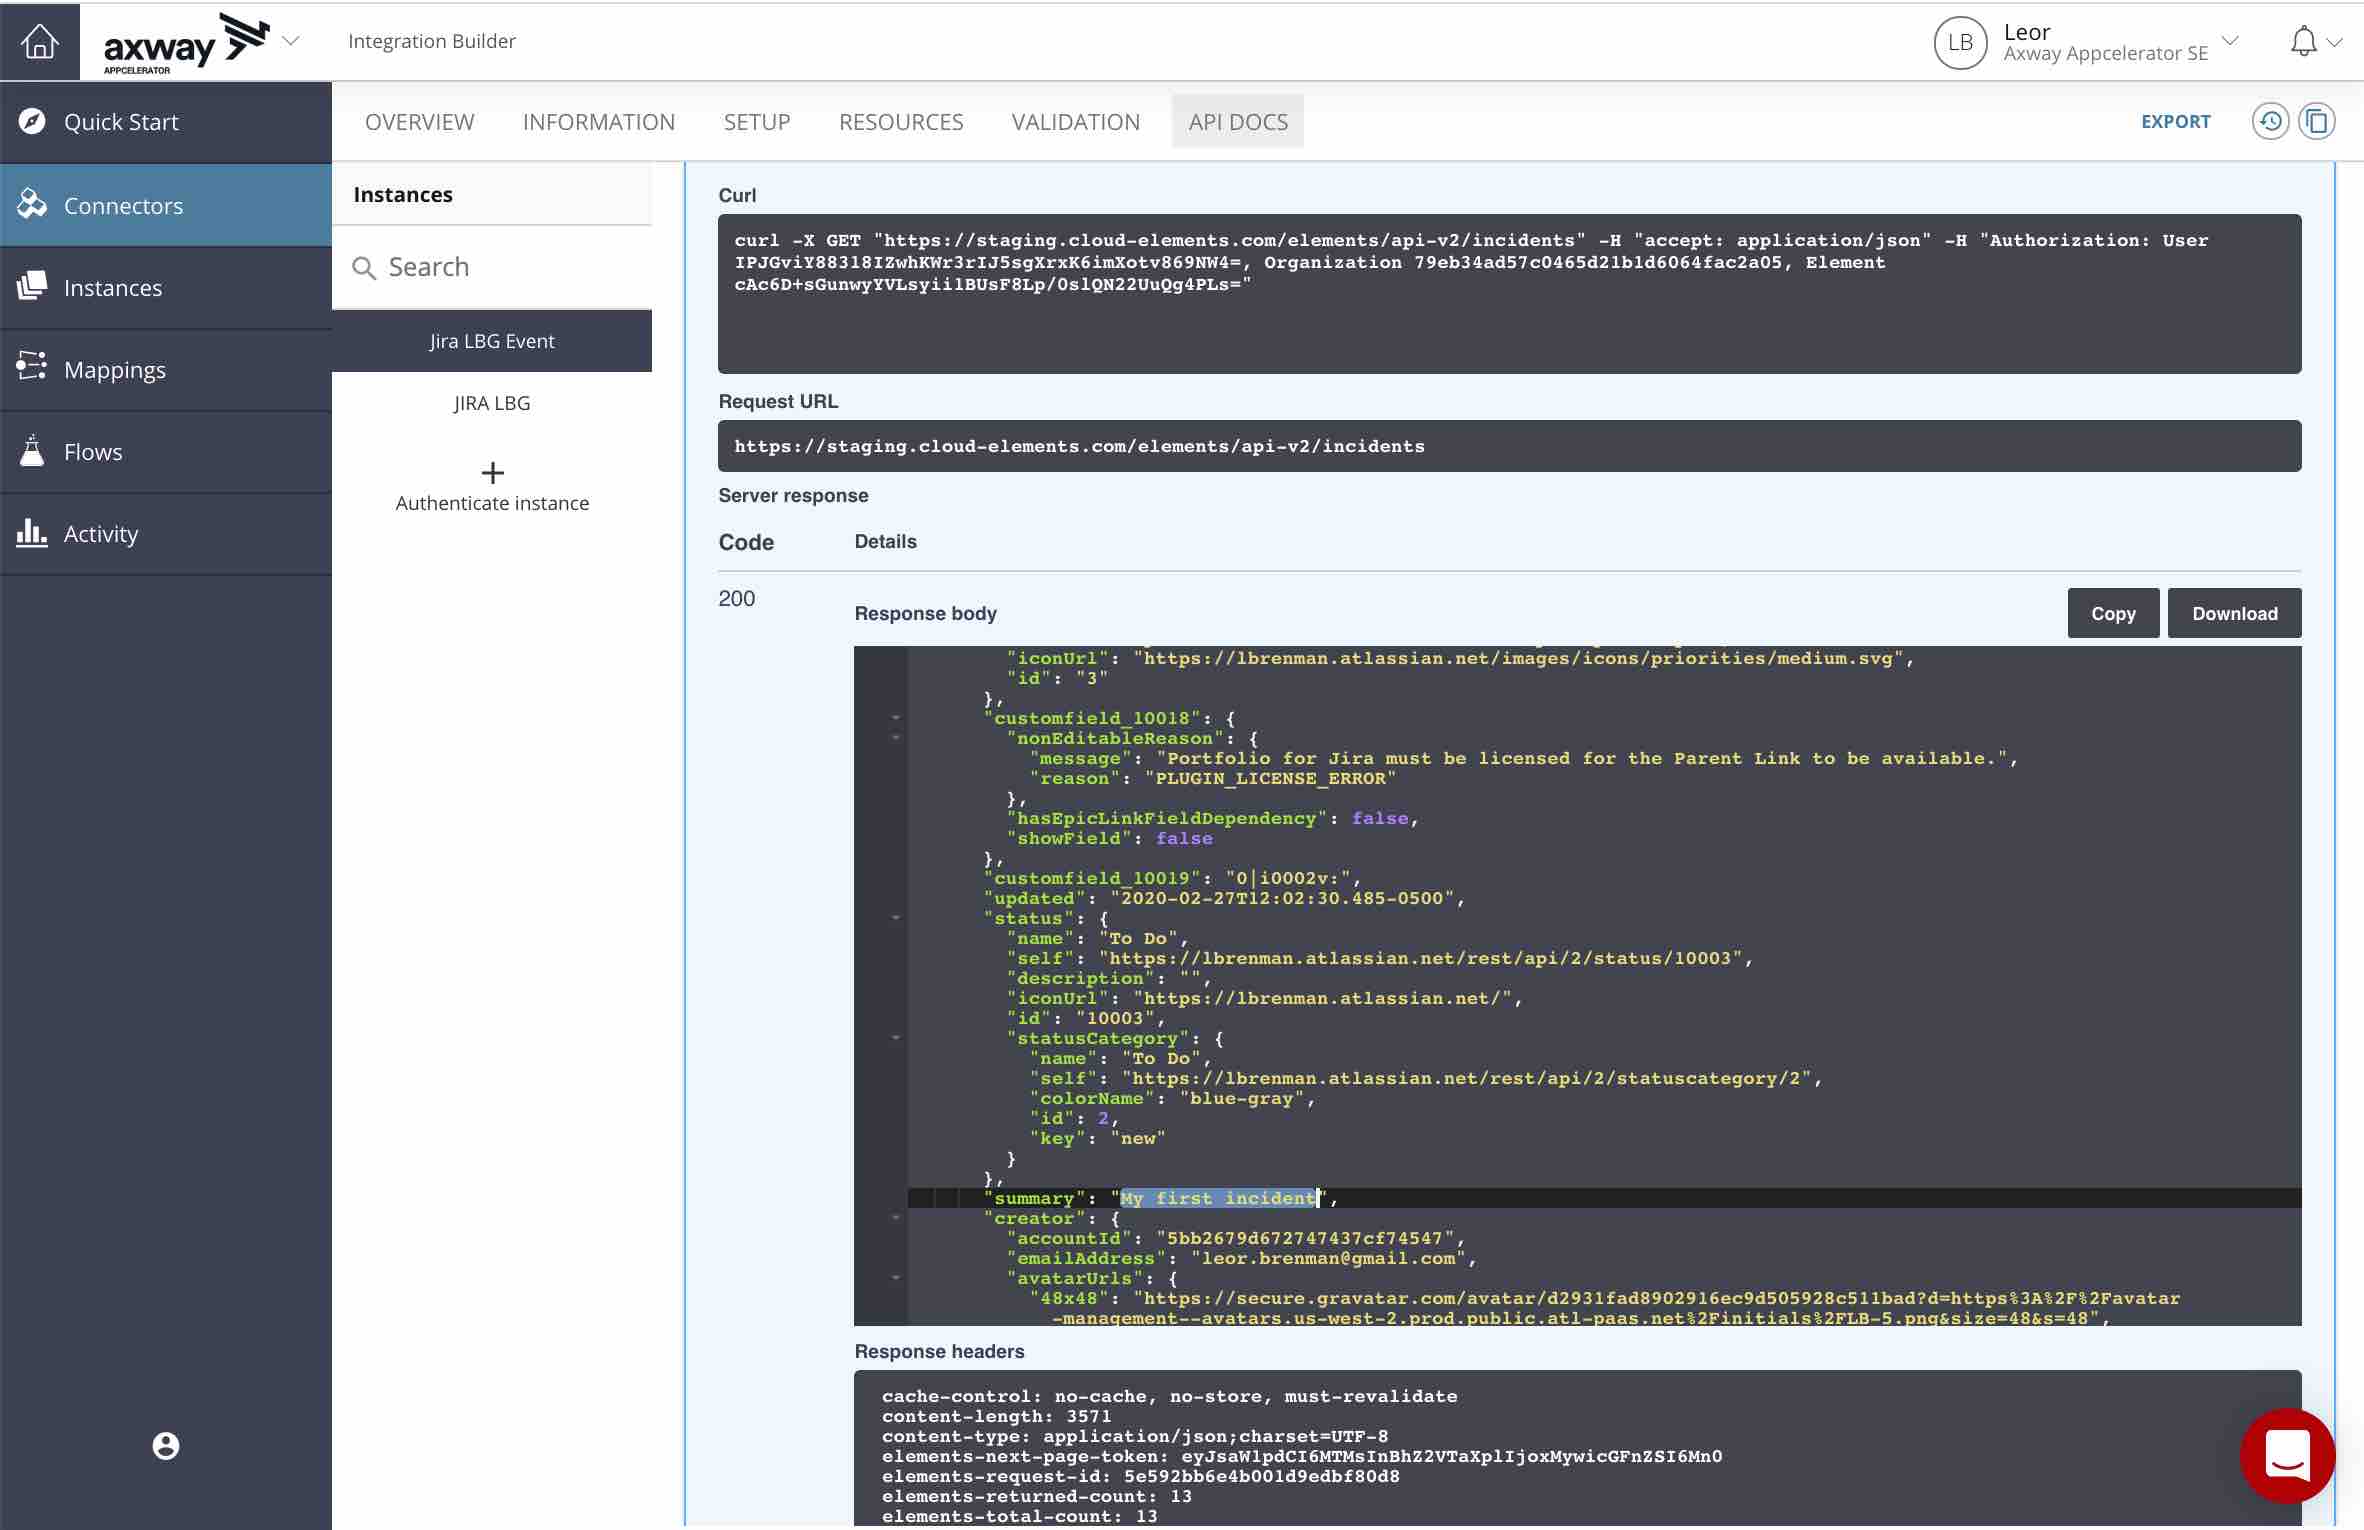
Note that in the response above there are incidents from my other project in addition to the incident we just created.
Summary
In this blog post, we described how to create a Jira developer instance and authenticate an Integration Builder Connector to the Jira instance. Now you can build flows that leverage Jira as we’ve done here.
In future blog posts, we’ll look at how to do more advanced operations such as changing an incident status and how Jira custom fields work.
Read about integrating Axway Application Integration and Slack.
Follow us on social