
In a prior blog post, we described how to set up a manually triggered flow and how the flow instance is exposed as an API in AMPLIFY Central. When the Central API is called by a client, the flow instance is triggered and a response is immediately sent to the client and the flow executes asynchronously.
FaaR (Flow as a Resource)
FaaR enables you to use the flow as an asynchronous API request with the flow building the response to the API request. After you update the formula to be used as a resource, you can make API requests to it at https://api.cloud-elements.com/elements/api-v2/<resourceName>.
As described above, the API will also be exposed in Central in order to govern it. Using a flow as a resource enables you to remove logic from your applications further. It also provides the ability to more efficiently chain requests together. You are basically using Integration Builder to create an API.
Create a FaaR Flow
We’ll follow the instructions on how to use Flow as a resource.
First, we’ll create a very simple flow to illustrate the steps for setting up the FaaR and then we’ll modify the flow to process a passed in parameter.
In future posts, we’ll implement a more complex aggregate API.
Create a FaaR Flow
- Create a new flow and set the trigger to manual. I called mine Simple FaaR
- Click the Edit button and the Show Advanced button
- In the section titled Execute Flow via API (BETA), do the following:
- Set the API Method to GET
- Enter an API URL using /{resource} syntax (e.g. /greeting)
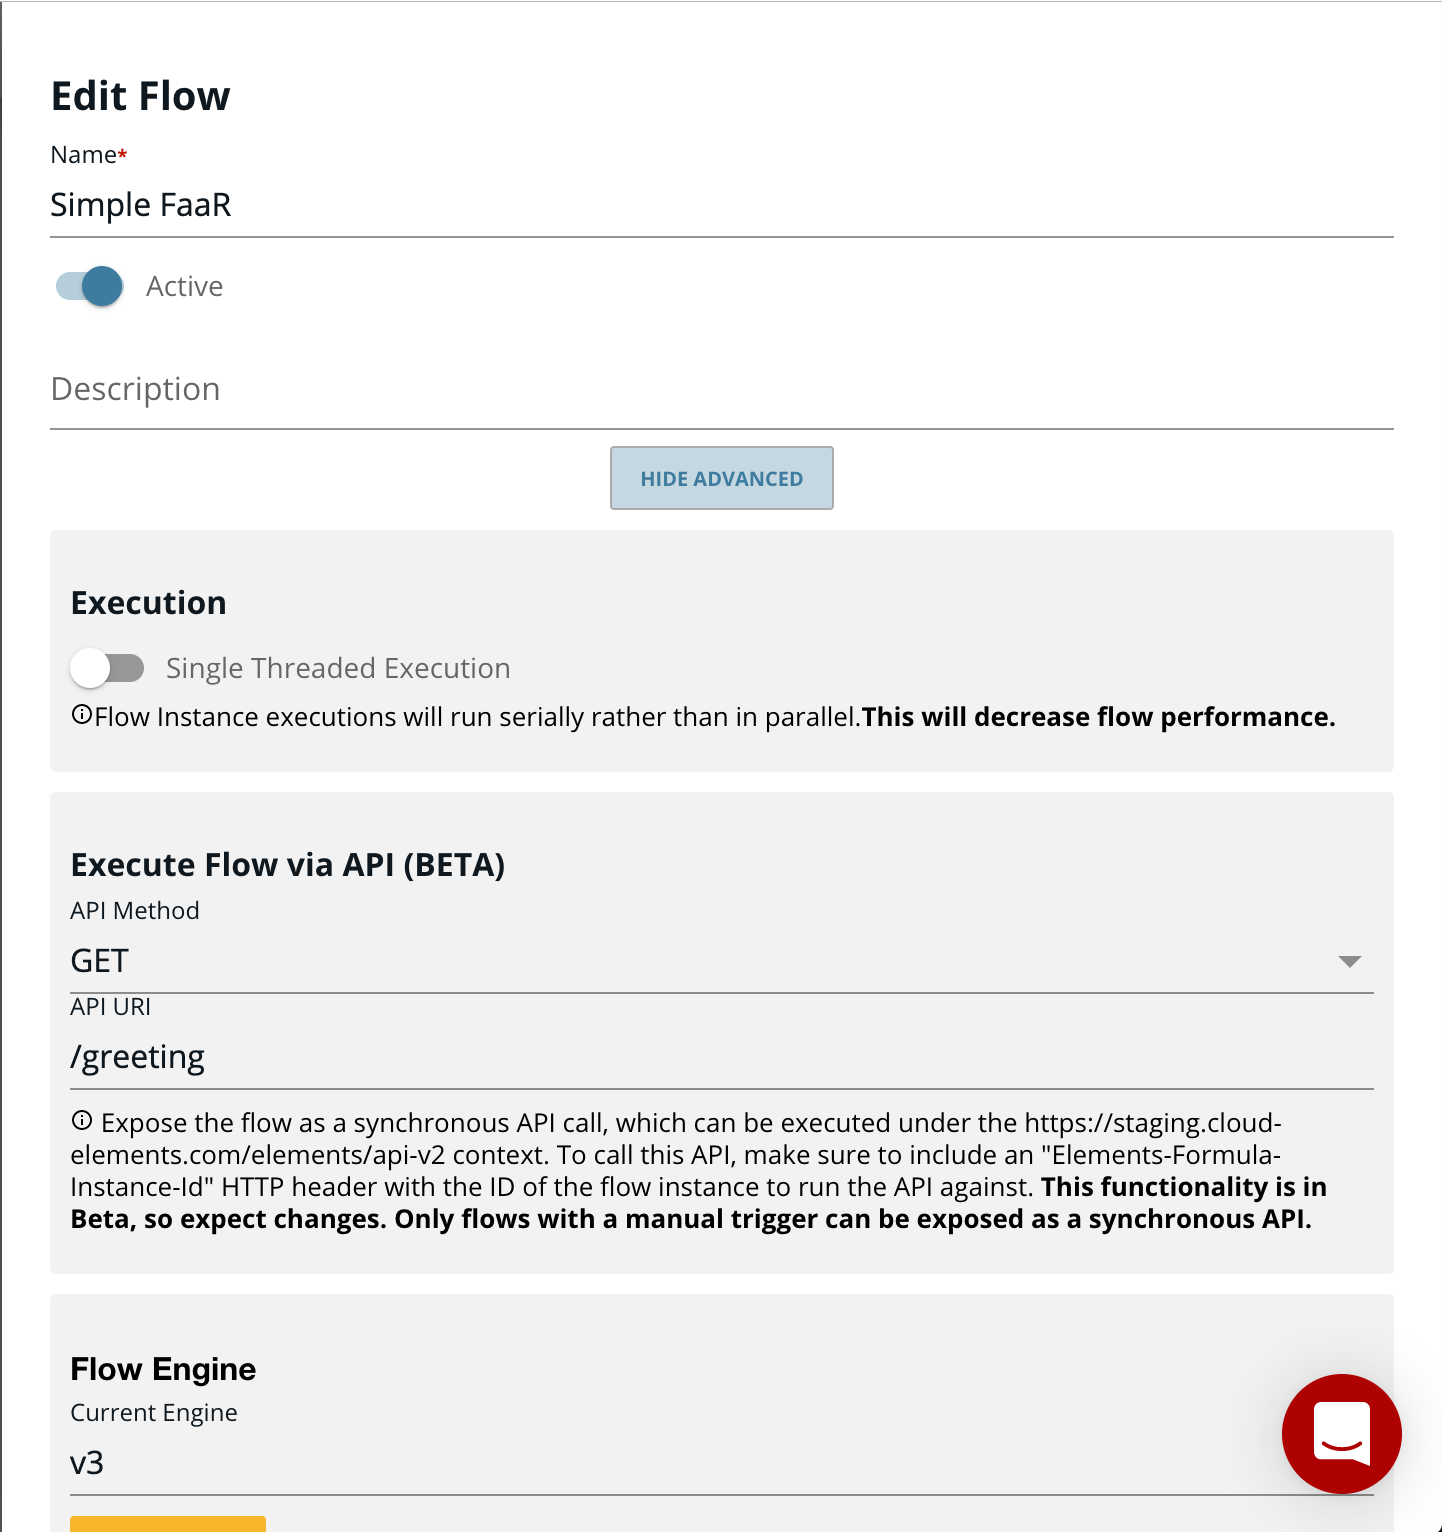

- Press Save
- Click on the plus button under the trigger step and let’s add a JS Script step to prepare the response to the API request. I called mine prepareResponse and it has the following contents:
done({
  statusCode: 200,
  result: "Hello"
});
Note that response has a status code and a result
At this point we are done without simple FaaR flow.
Create an Instance of the FaaR Flow
Now let’s create an instance so that we can call this API.
- In the flows tab, find the flow template you just created above and hover over its tile and click on Create Instance.
- Give you instance a name and click on the Create Instance button (I called mine Simple FaaR instance),
- You can follow the instructions to test your flow in the Flow API Docs but we’ll do this in AMPLIFY Central in the next section.
Test API in AMPLIFY Central
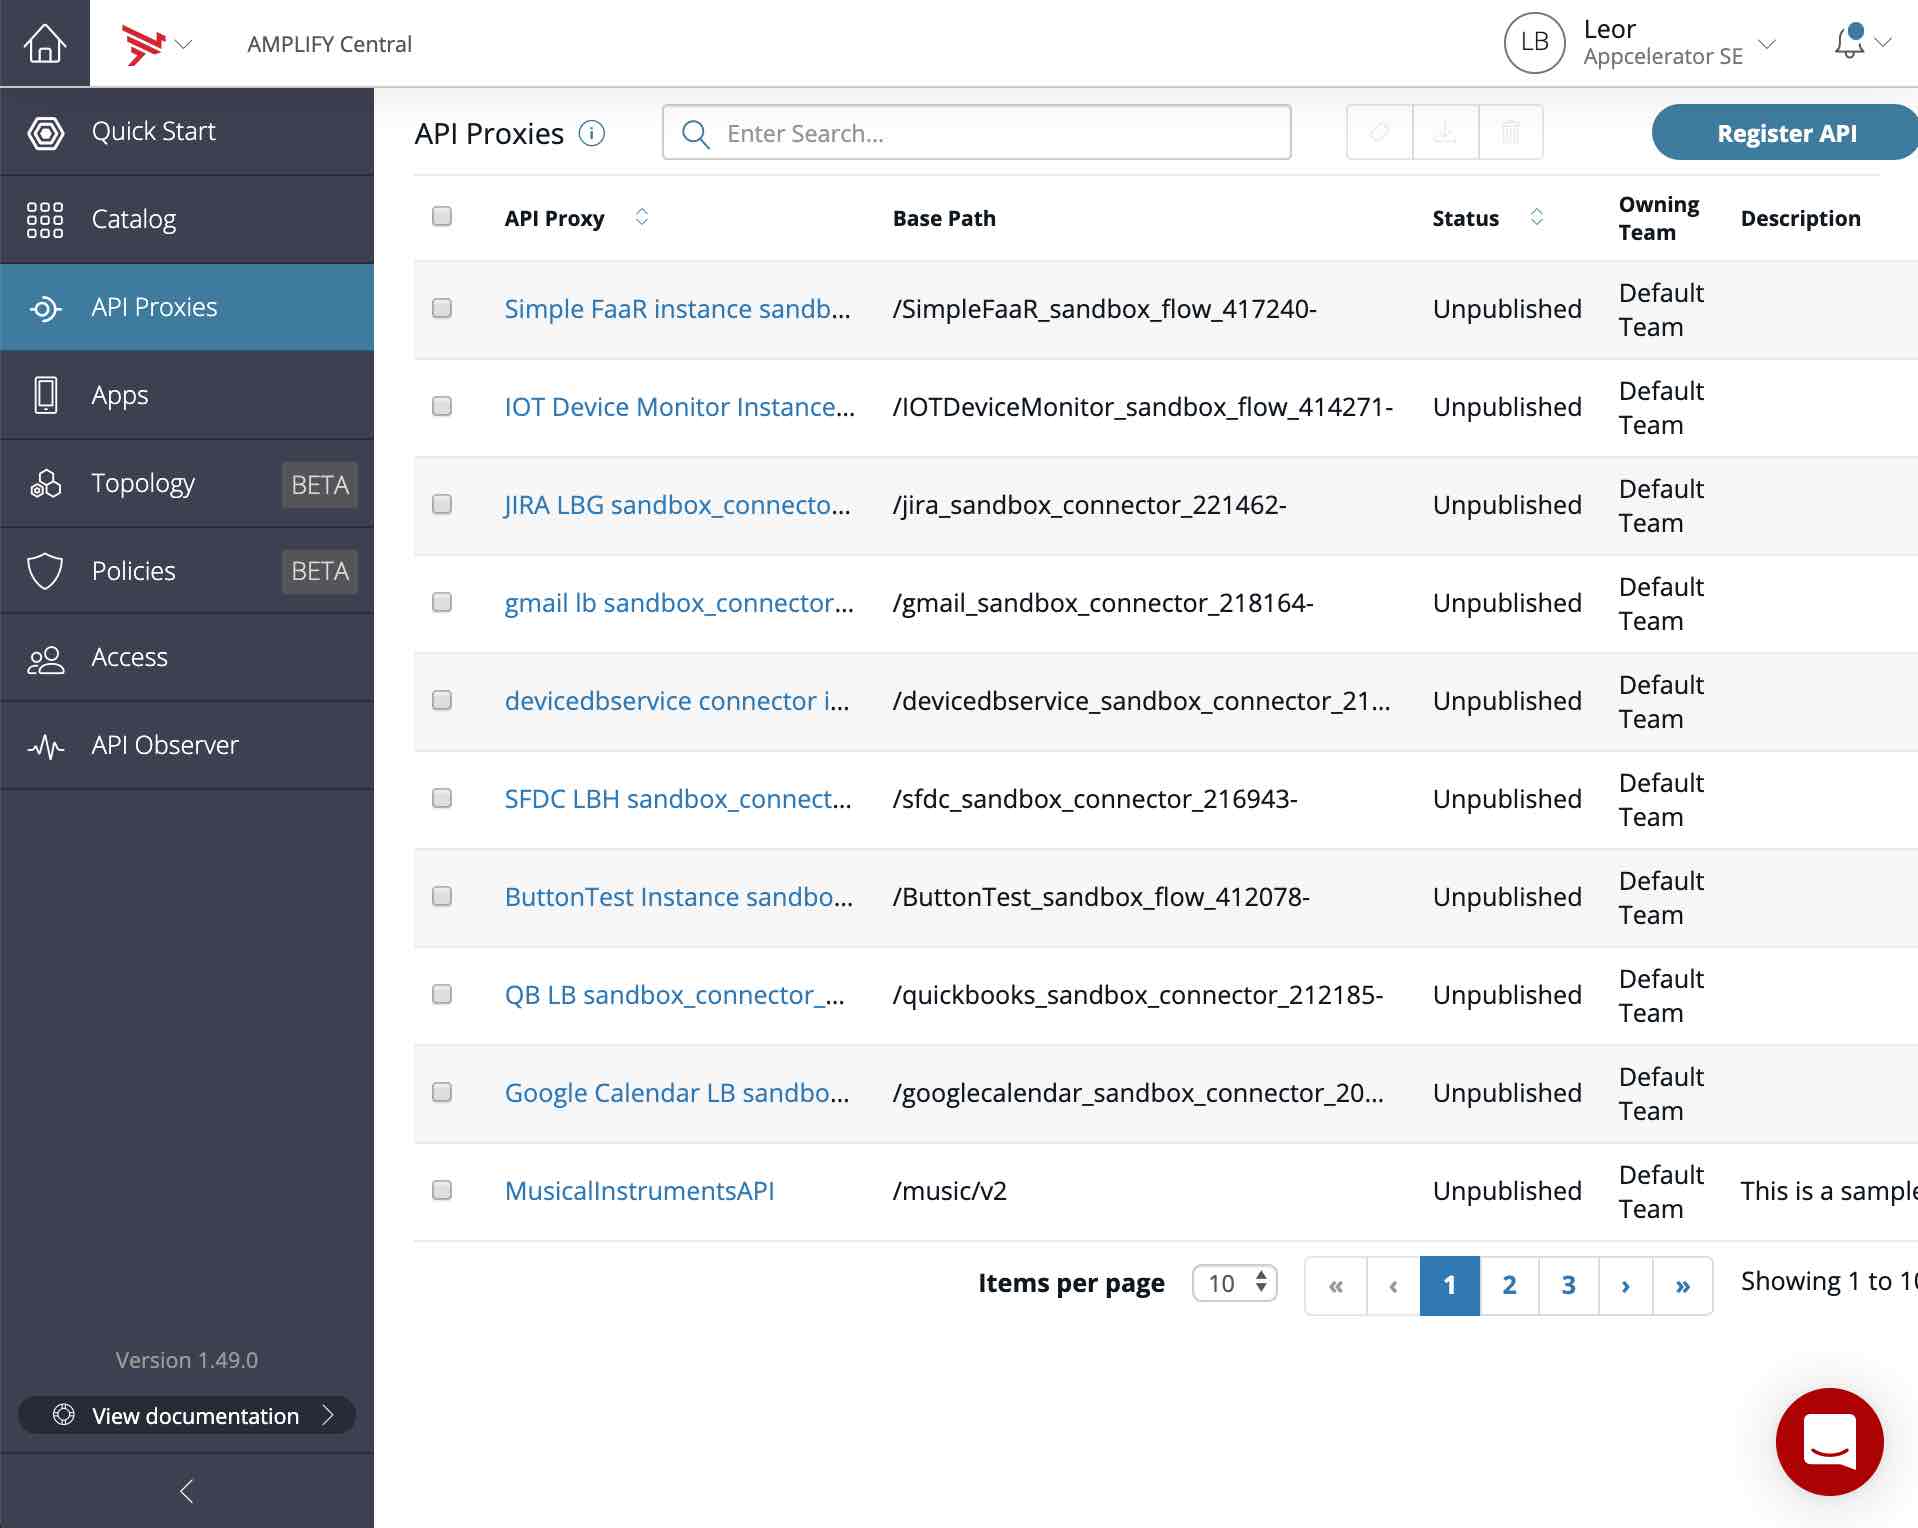
We discussed how manually triggered flows are exposed as API Proxies in AMPLIFY Central and the flow we just created is a manually triggered flow so let’s go to Central and find our API.
- Launch Central in another browser tab.
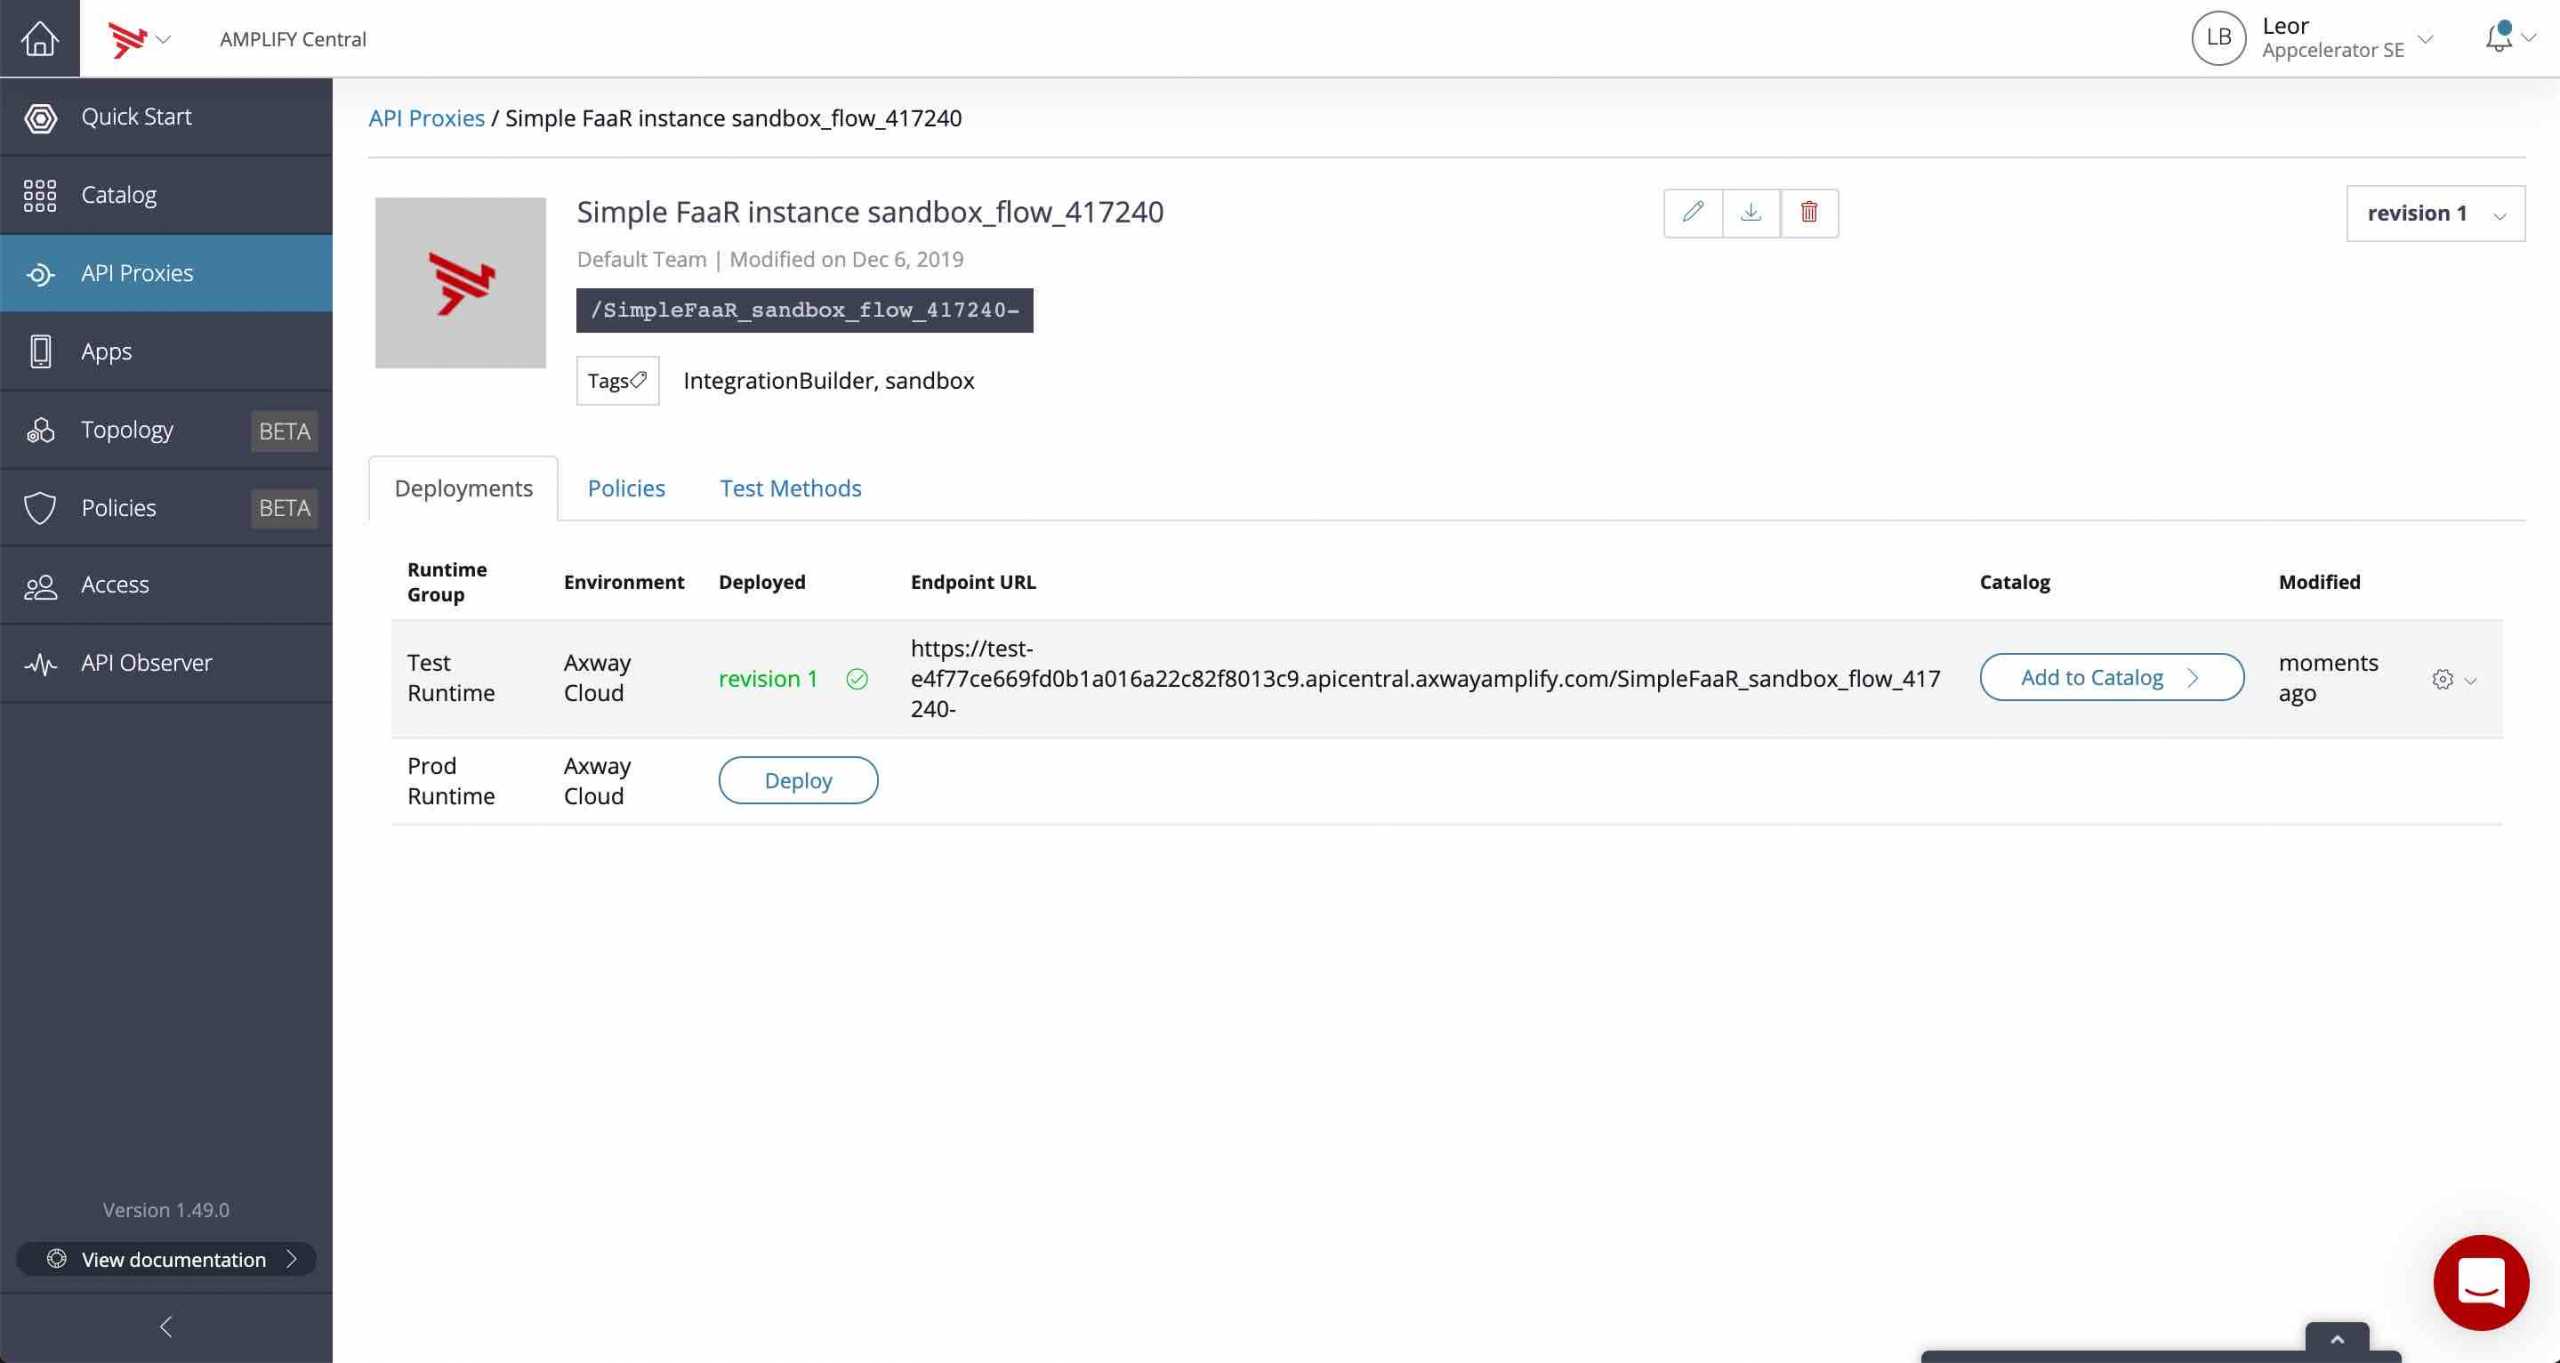
- Go to API Proxies and you should see a proxy for your FaaR flow at the top
- Click on the API Proxy and click on Deploy in the Test Runtime
- Click on the Test Methods tab and expand the /greeting api and press Execute
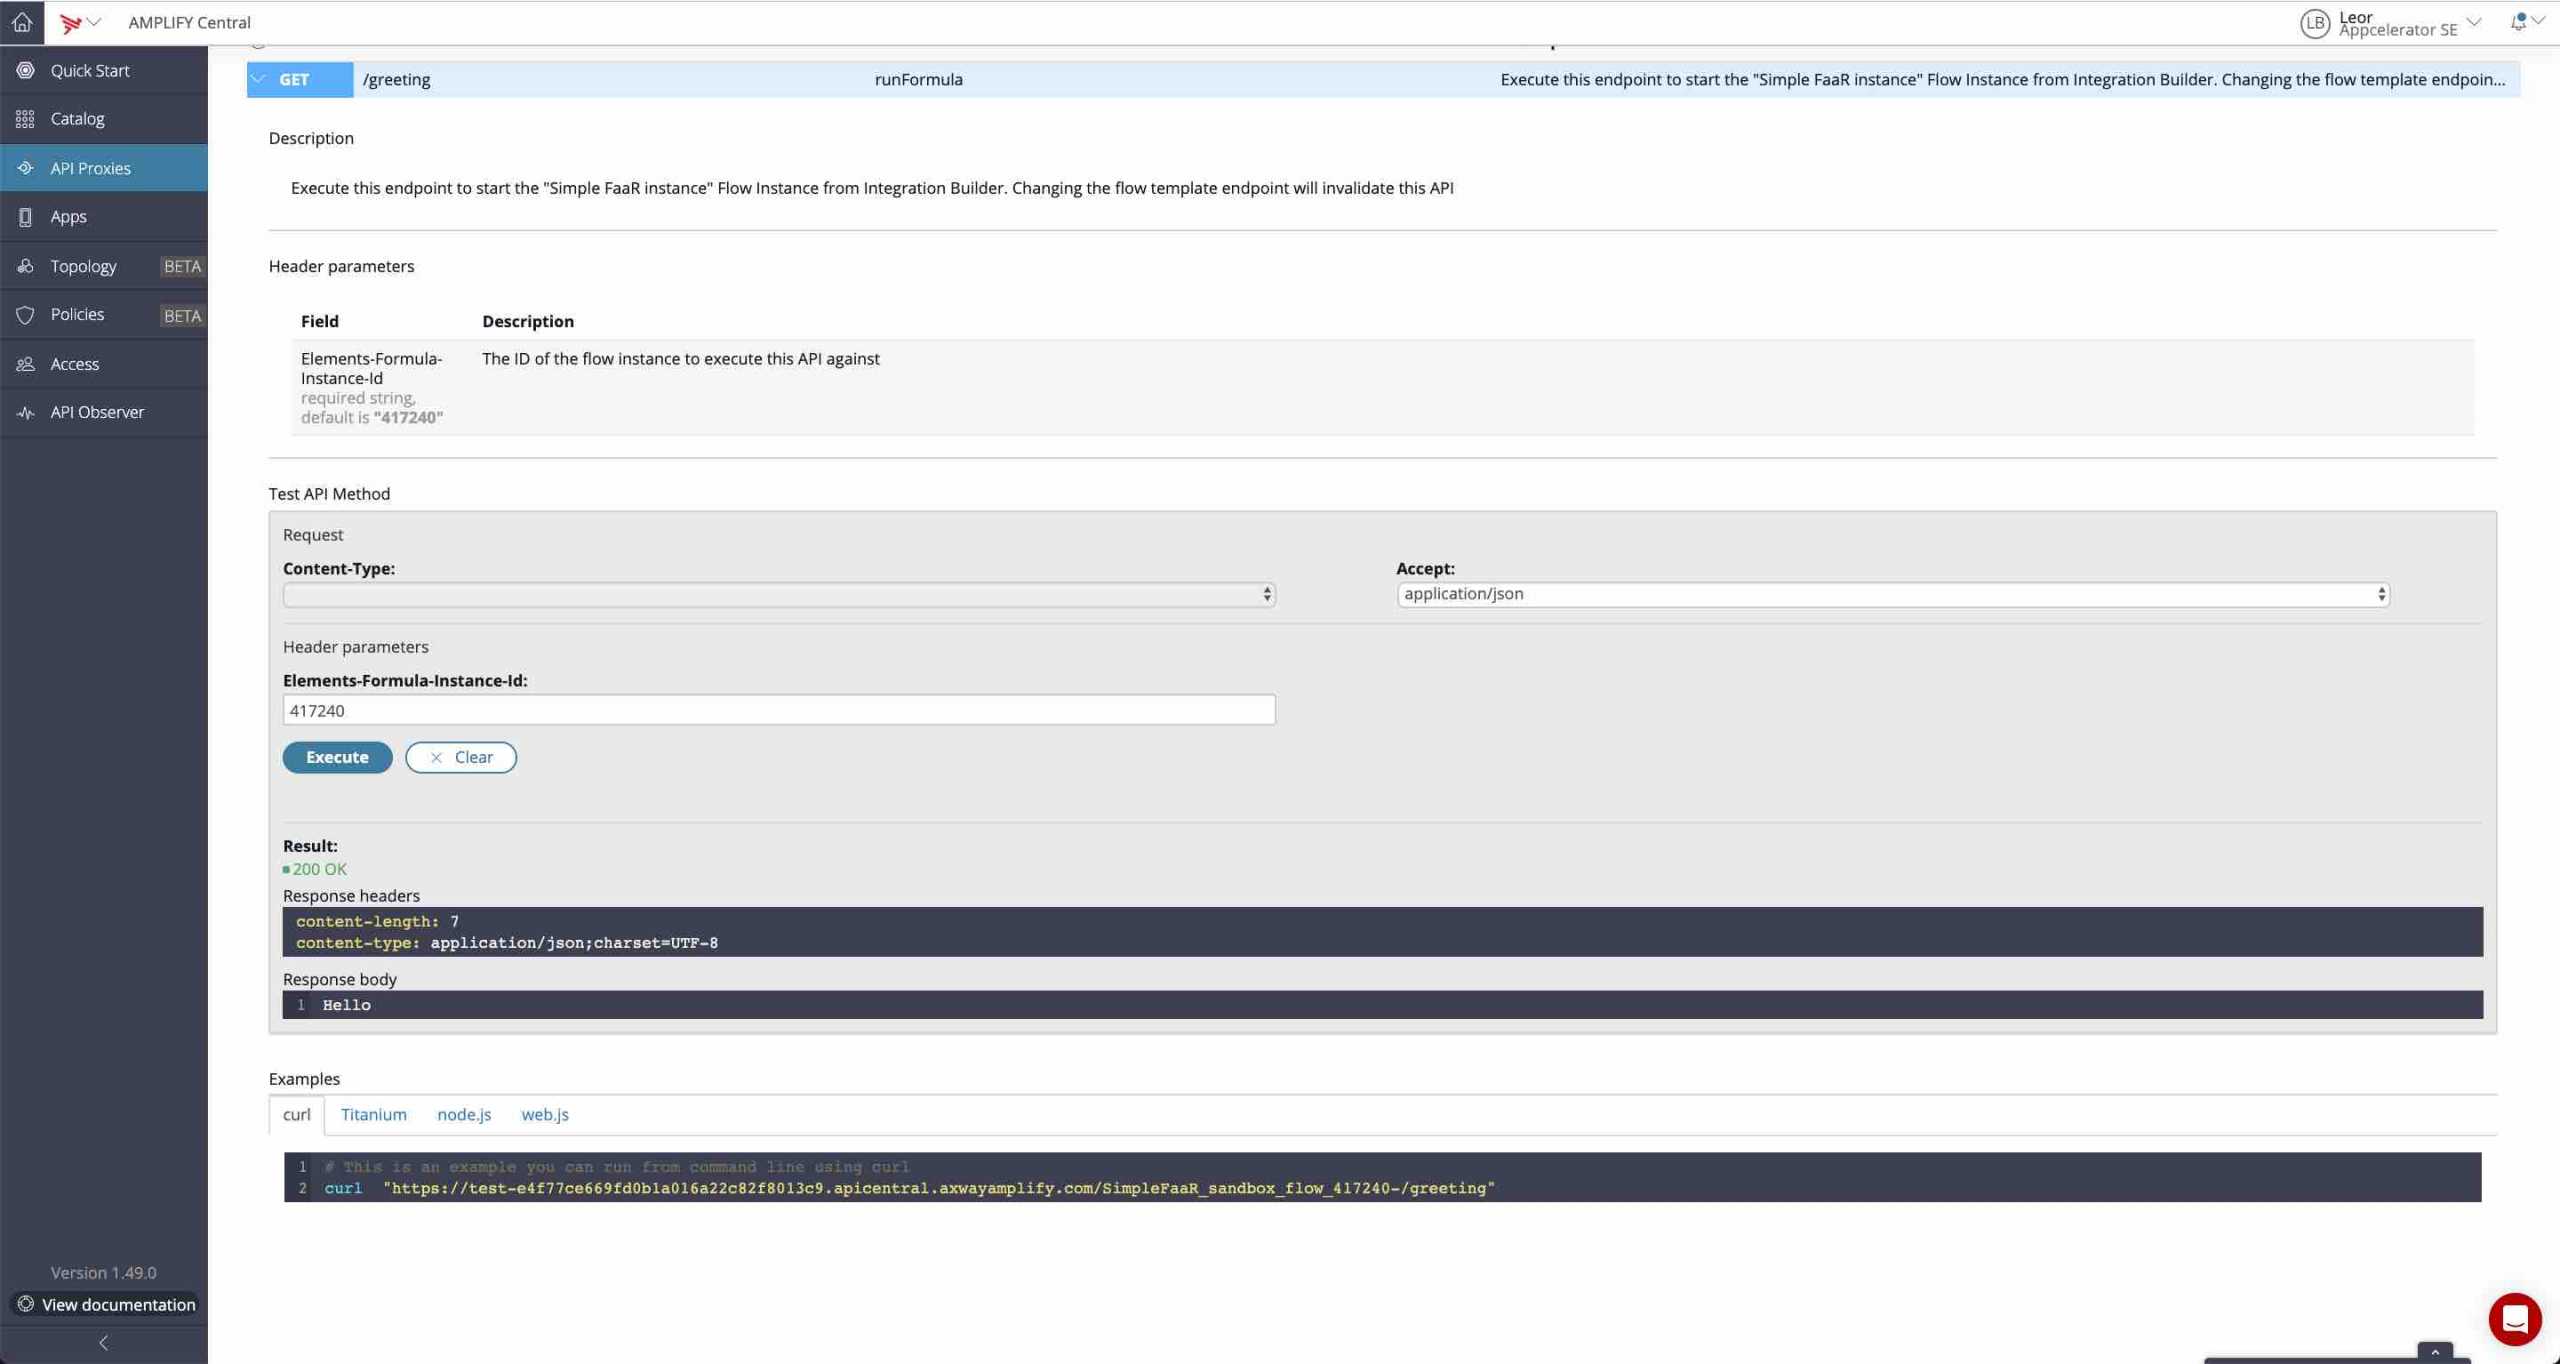
Note that the status is 200 and the result is “Hello” since that’s we coded in the prepareResponse JS Script step in our flow.
Reviewing the API doc in Central, you can see that we need to pass in a header, Elements-Formula-Instance-Id with a value of the instance id. In my example, the instance id is 417240. This is all already populated in the Central API doc as shown in the screenshot above.
The curl command is:
curl -X GET 'https://test-e4f77ce669fd0b1a016a22c82f8013c9.apicentral.axwayamplify.com/SimpleFaaR_sandbox_flow_417240-/greeting' -H 'Elements-Formula-Instance-Id: 417240'
Pass in a Parameter
Let’s see how we can pass in a parameter in the API call. It’s actually quite simple, we just append the query parameter to the URL as follows:
curl -X GET 'https://test-e4f77ce669fd0b1a016a22c82f8013c9.apicentral.axwayamplify.com/SimpleFaaR_sandbox_flow_417240-/greeting?name=Leor' -H 'Elements-Formula-Instance-Id: 417240'
with response:
“Hello”
Note that in the example above, I am passing in my name (Leor) in the query parameter name.
If we review the executions of our flow and click on the trigger step, we can see that the query parameters are in trigger.args.request.query as described here:
{
  "request": {
    "headers": {
      "accept": "*/*",
      "authorization": "User IPJGviY88318IZwhKWr3rIJ5sgXrxK6imXotv869NW4=, Organization 79eb34ad57c0465d21b1d6064fac2a05",
      "connection": "keep-alive",
      "elements-formula-instance-id": "417240",
      "host": "staging.cloud-elements.com",
      "user-agent": "curl/7.54.0",
      "x-axway-proxy-handler-count": "1",
      "x-axway-tenant-id": "100000142",
      "x-consumer-custom-id": "7861:18281:21107",
      "x-consumer-id": "48ae2b60-3694-4fcf-bbc5-e57afe27673f",
      "x-consumer-username": "lbrenman@appcelerator.com@18281.7861.generated",
      "x-forwarded-host": "staging.cloud-elements.com",
      "x-forwarded-port": "8000",
      "x-forwarded-proto": "http",
      "x-real-ip": "127.0.0.1"
    },
    "query": {
      "id": "1111111"
    }
  }
}
Let’s modify our flow to use this parameter.
Modify the code in the prepareResponse JS Step as follows:
done({
  statusCode: 200,
  result: "Hello "+trigger.args.request.query.name
});
Now when we make the API request below:
curl -X GET 'https://test-e4f77ce669fd0b1a016a22c82f8013c9.apicentral.axwayamplify.com/SimpleFaaR_sandbox_flow_417240-/greeting?name=Leor' -H 'Elements-Formula-Instance-Id: 417240'
the response is:
“Hello Leor”
Summary
In this blog post, we saw how we can use a Flow as a Resource (FaaR) and call it through AMPLIFY Central. We also saw how to pass in a parameter and use it to prepare the response. In future posts, we’ll implement a more complex aggregate API.
Follow us on social